
Reach
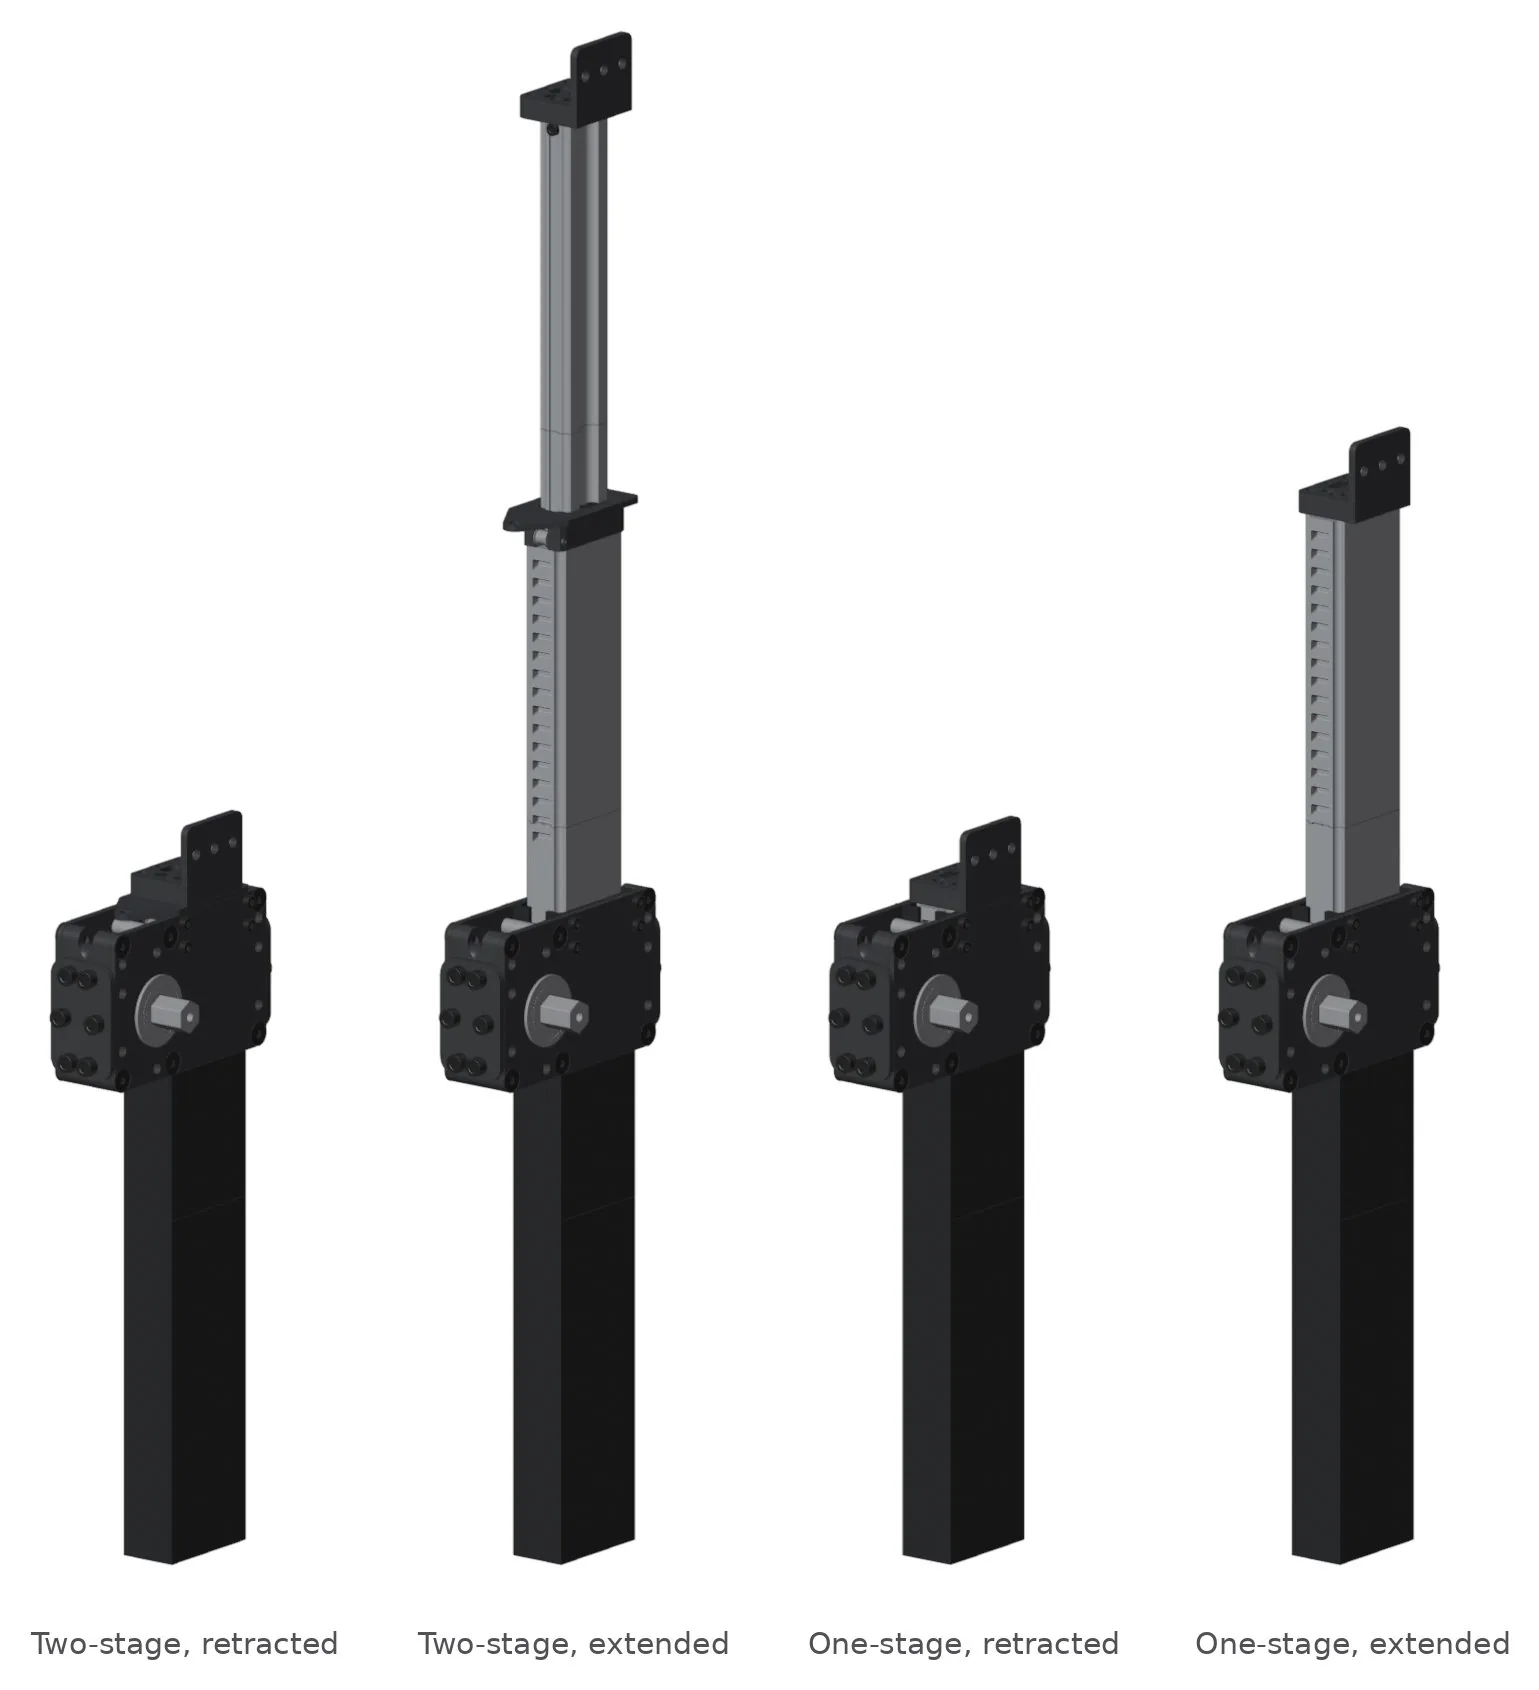
| 1-stage stroke | 39.60 in |
|---|---|
| 2-stage stroke | 79.20 in |
| 1-stage extended | 86.60 in |
| 2-stage extended | 126.20 in |
Cut list
| Tube | Length | CAD cut |
|---|---|---|
| Outer 2"×1" tube | 47.00 | 0.00 |
| Middle tube | 46.00 | 0.00 |
| Inner tube | 46.25 | 0.00 |
Introducing the SWYFT Ascend FRC Telescoping Elevator V2, the next evolution of our game-changing solution engineered to elevate your robot to new heights. This cutting-edge elevator is even more lightweight and compact, featuring a slider-free design with steel balls for ultimate stability and almost zero wobble. With enhanced strength, reliability, and unparalleled customization options, V2 ensures a perfect fit for your robot's unique needs while delivering superior performance under intense stress.
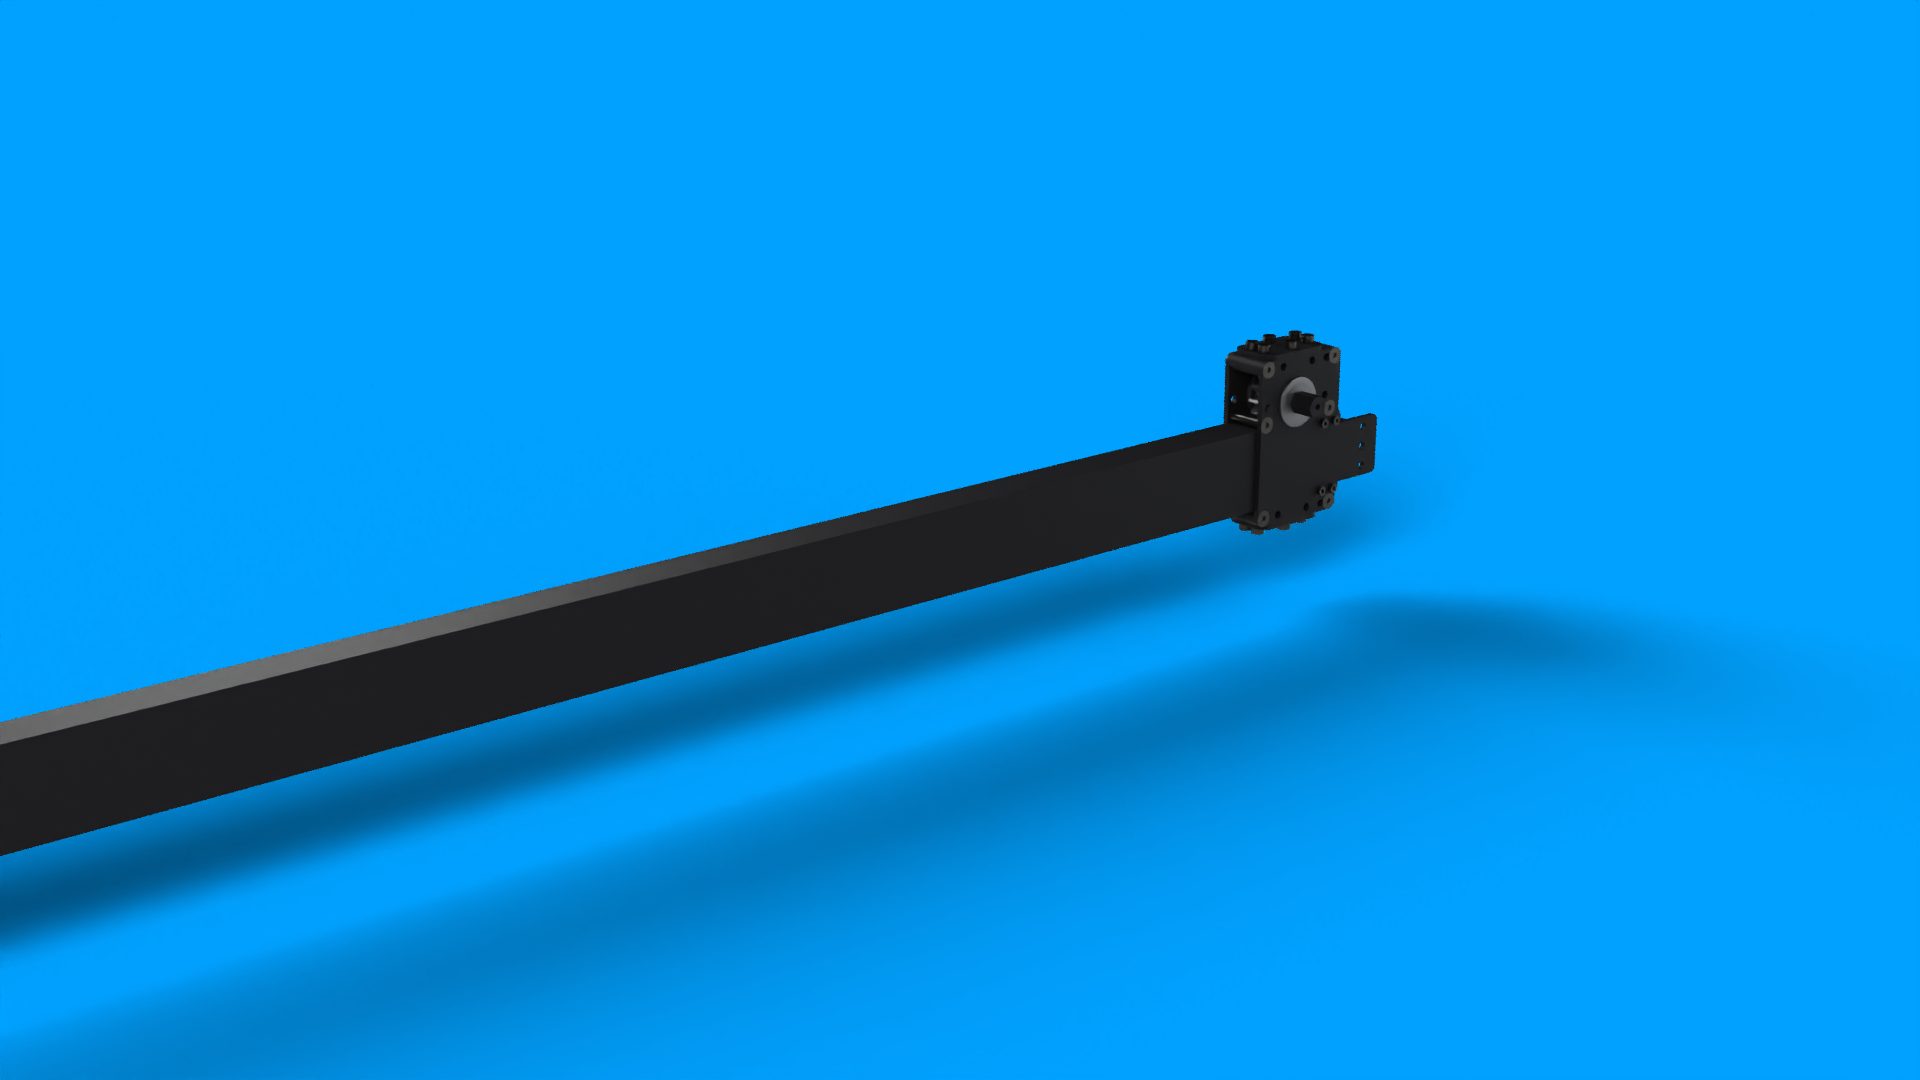
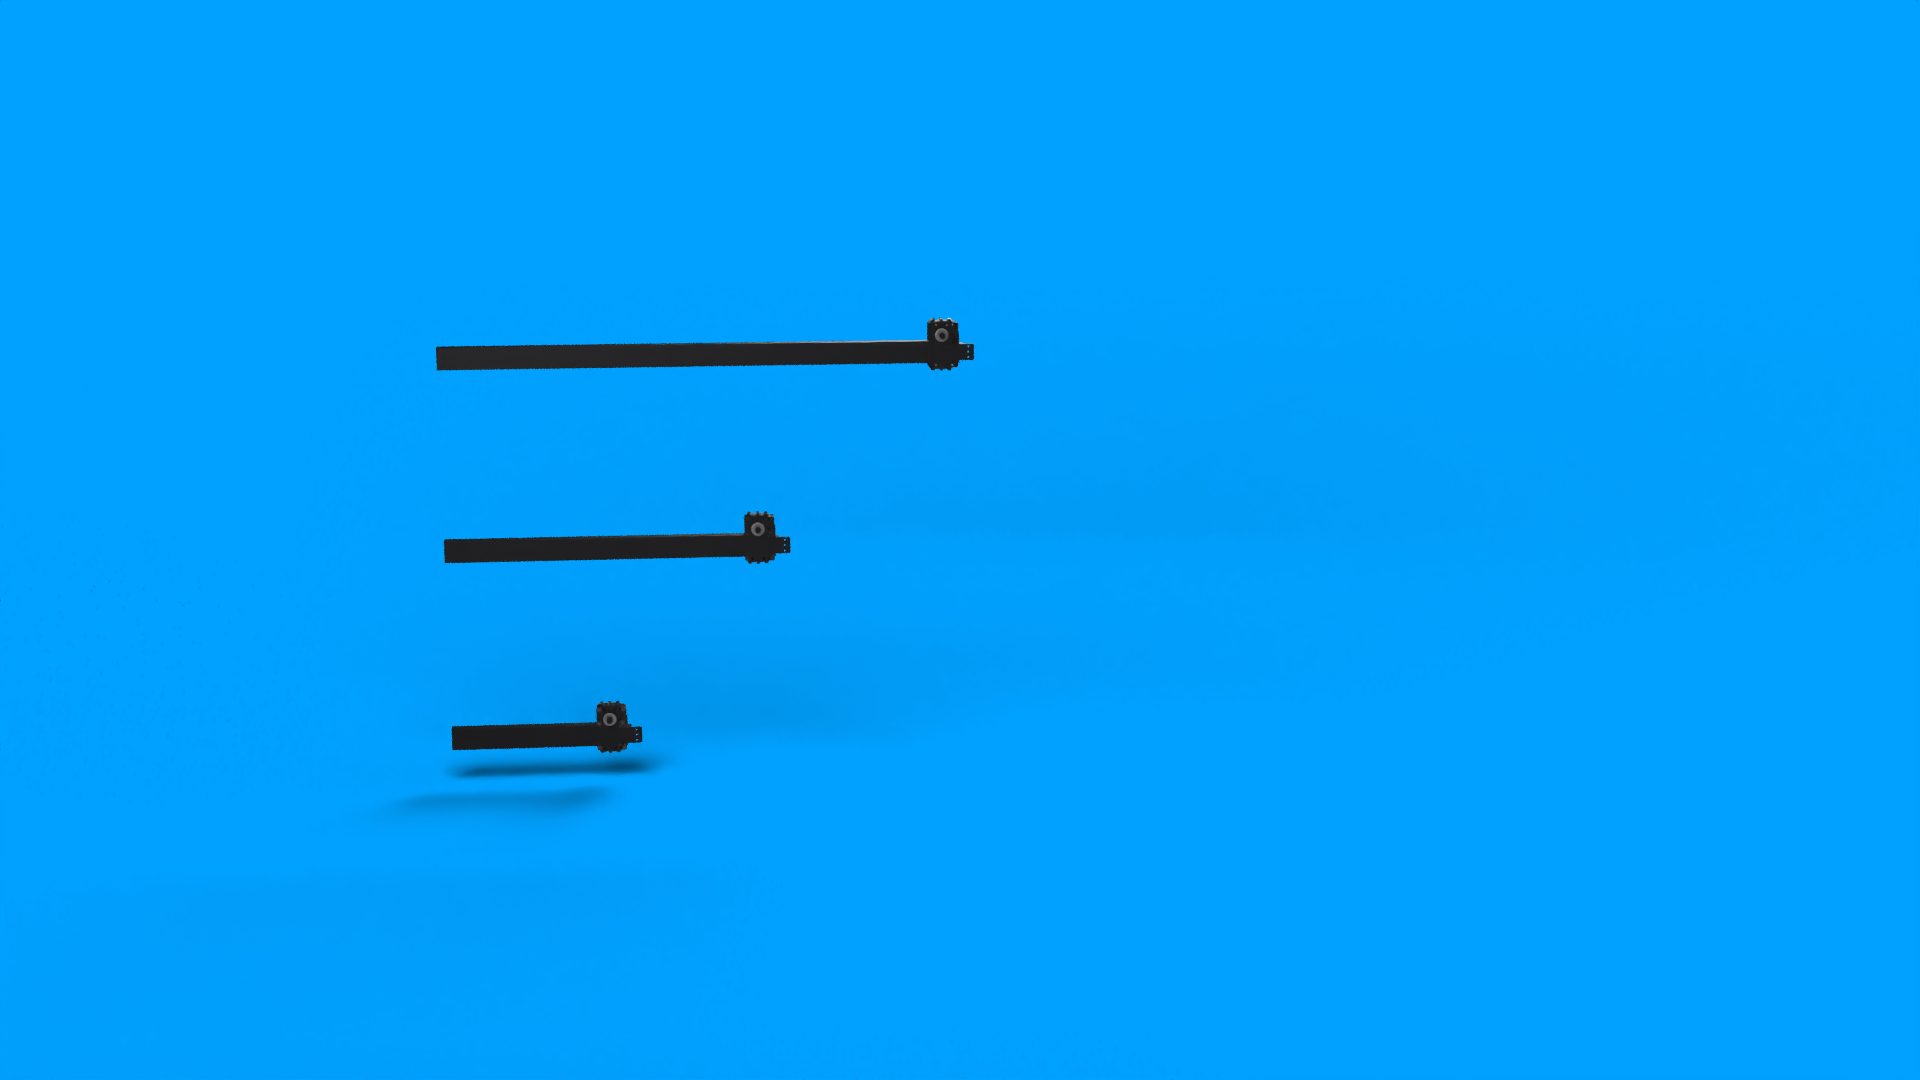

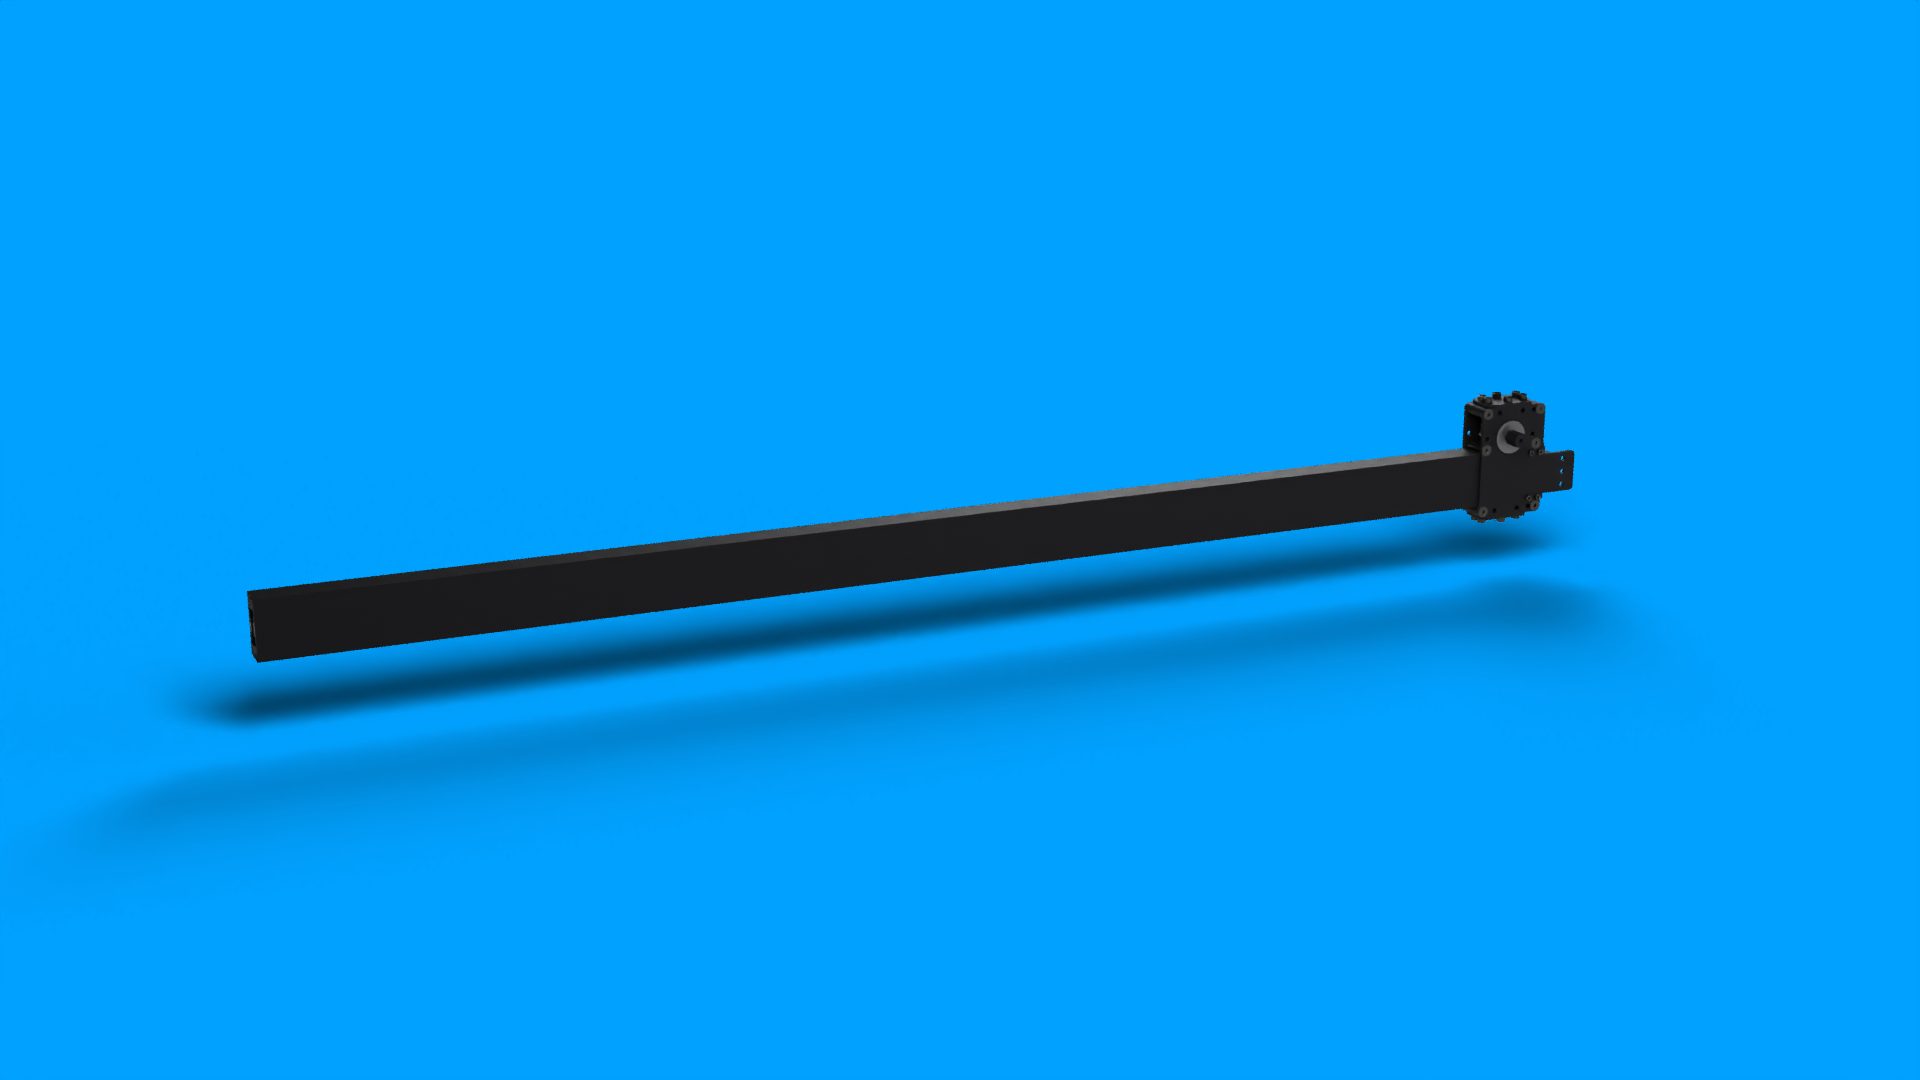
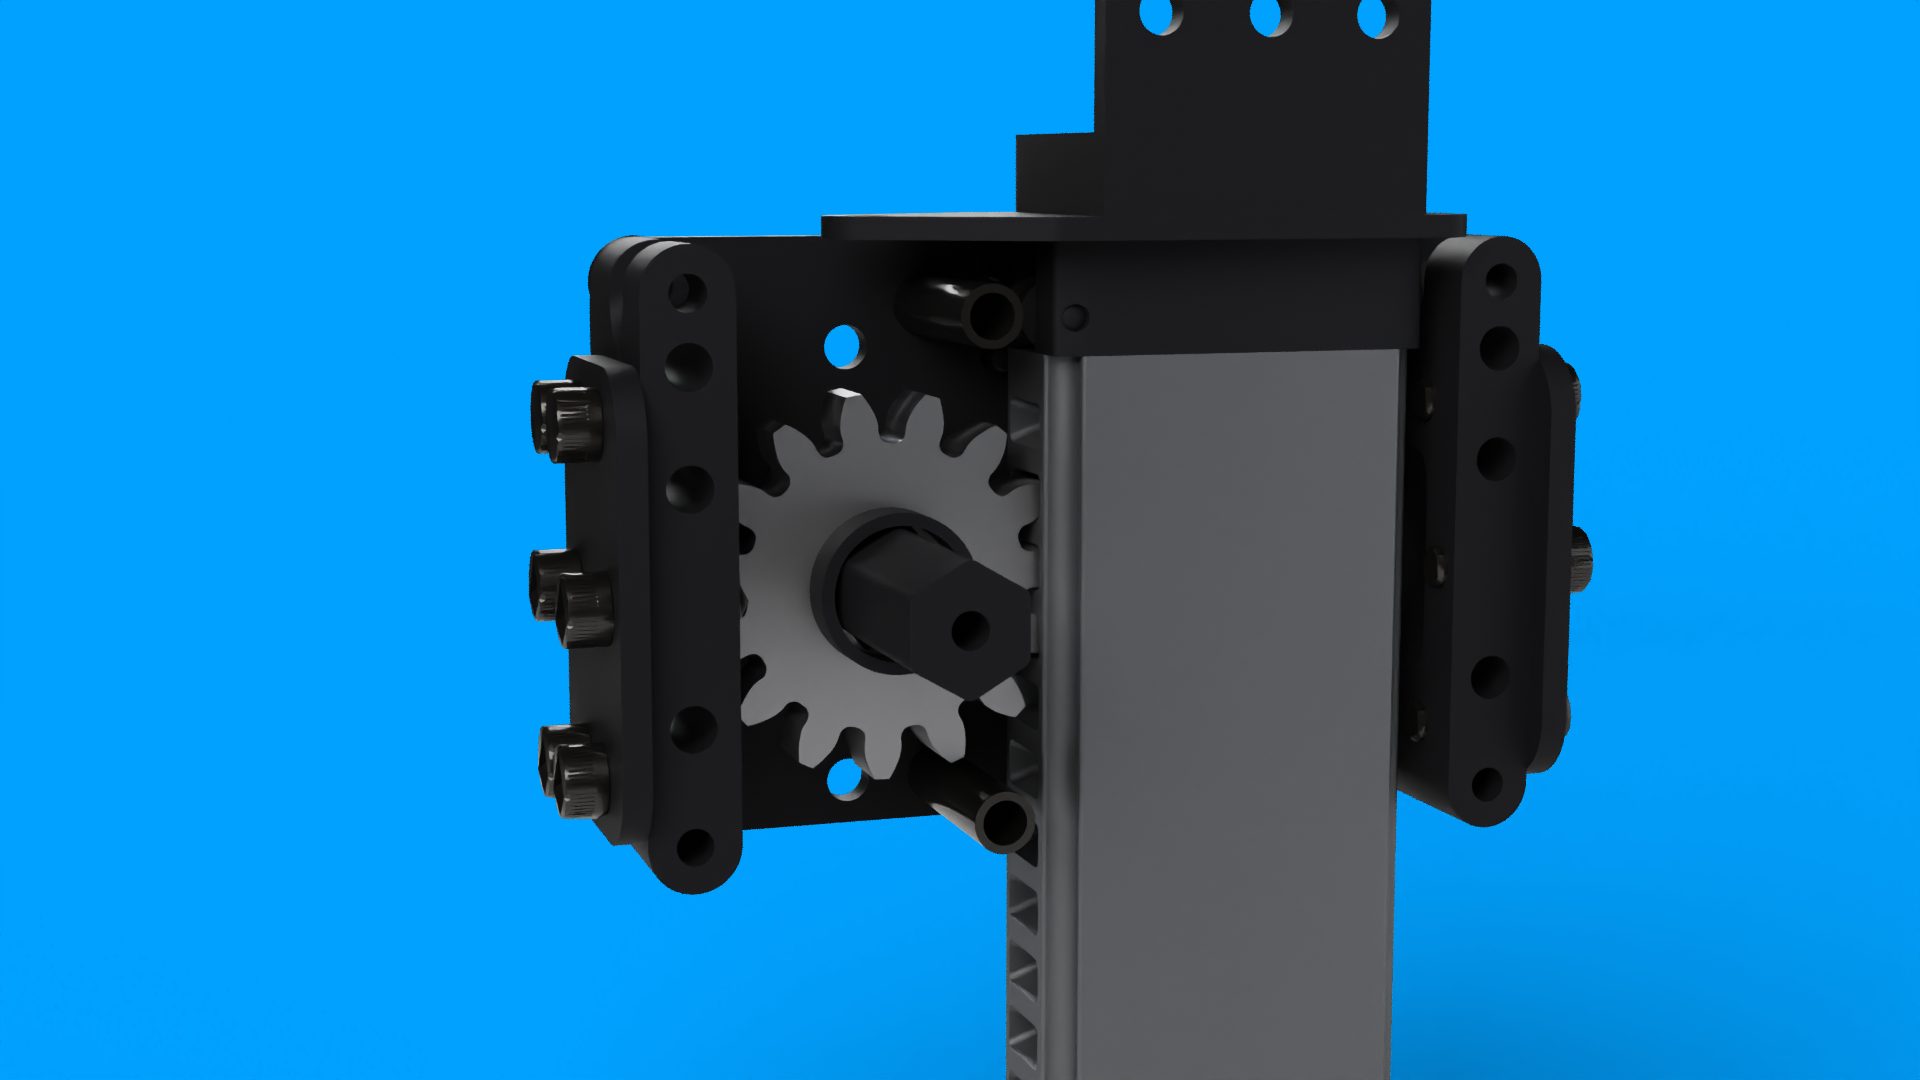
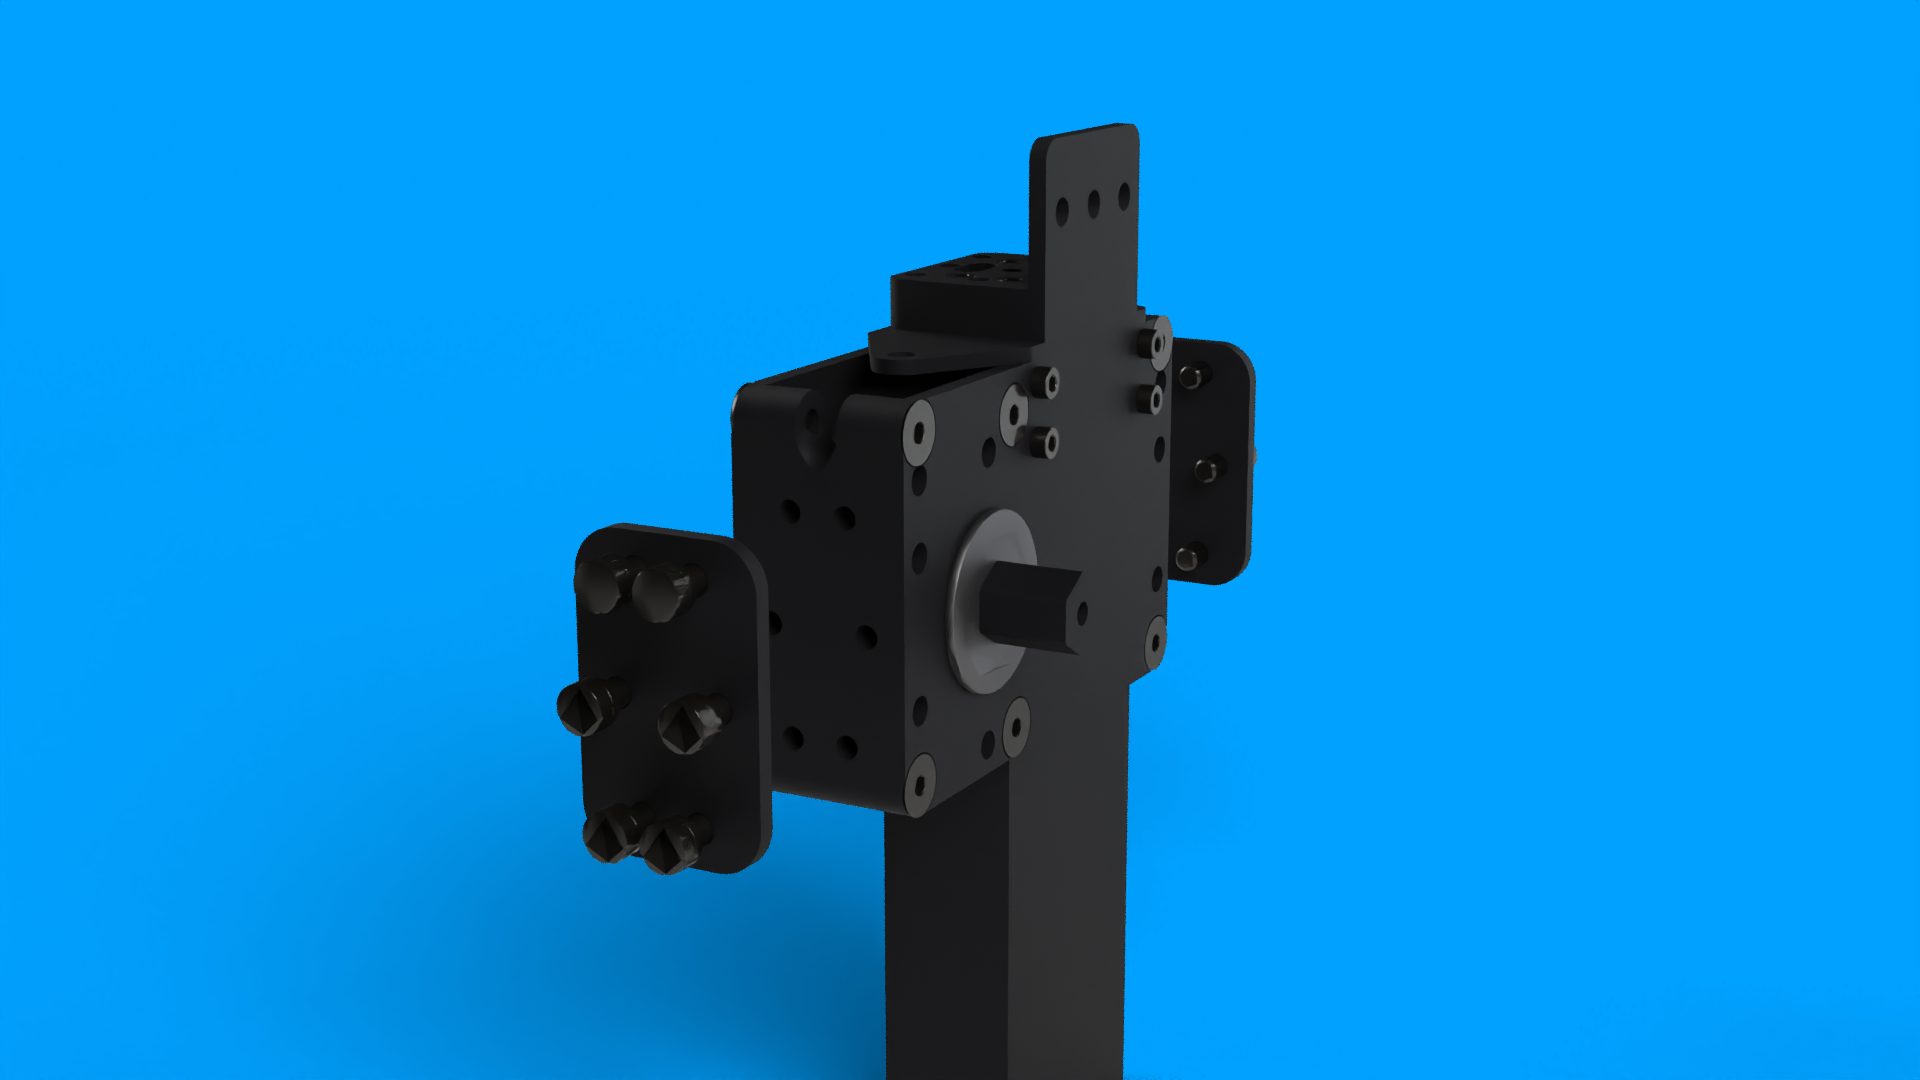
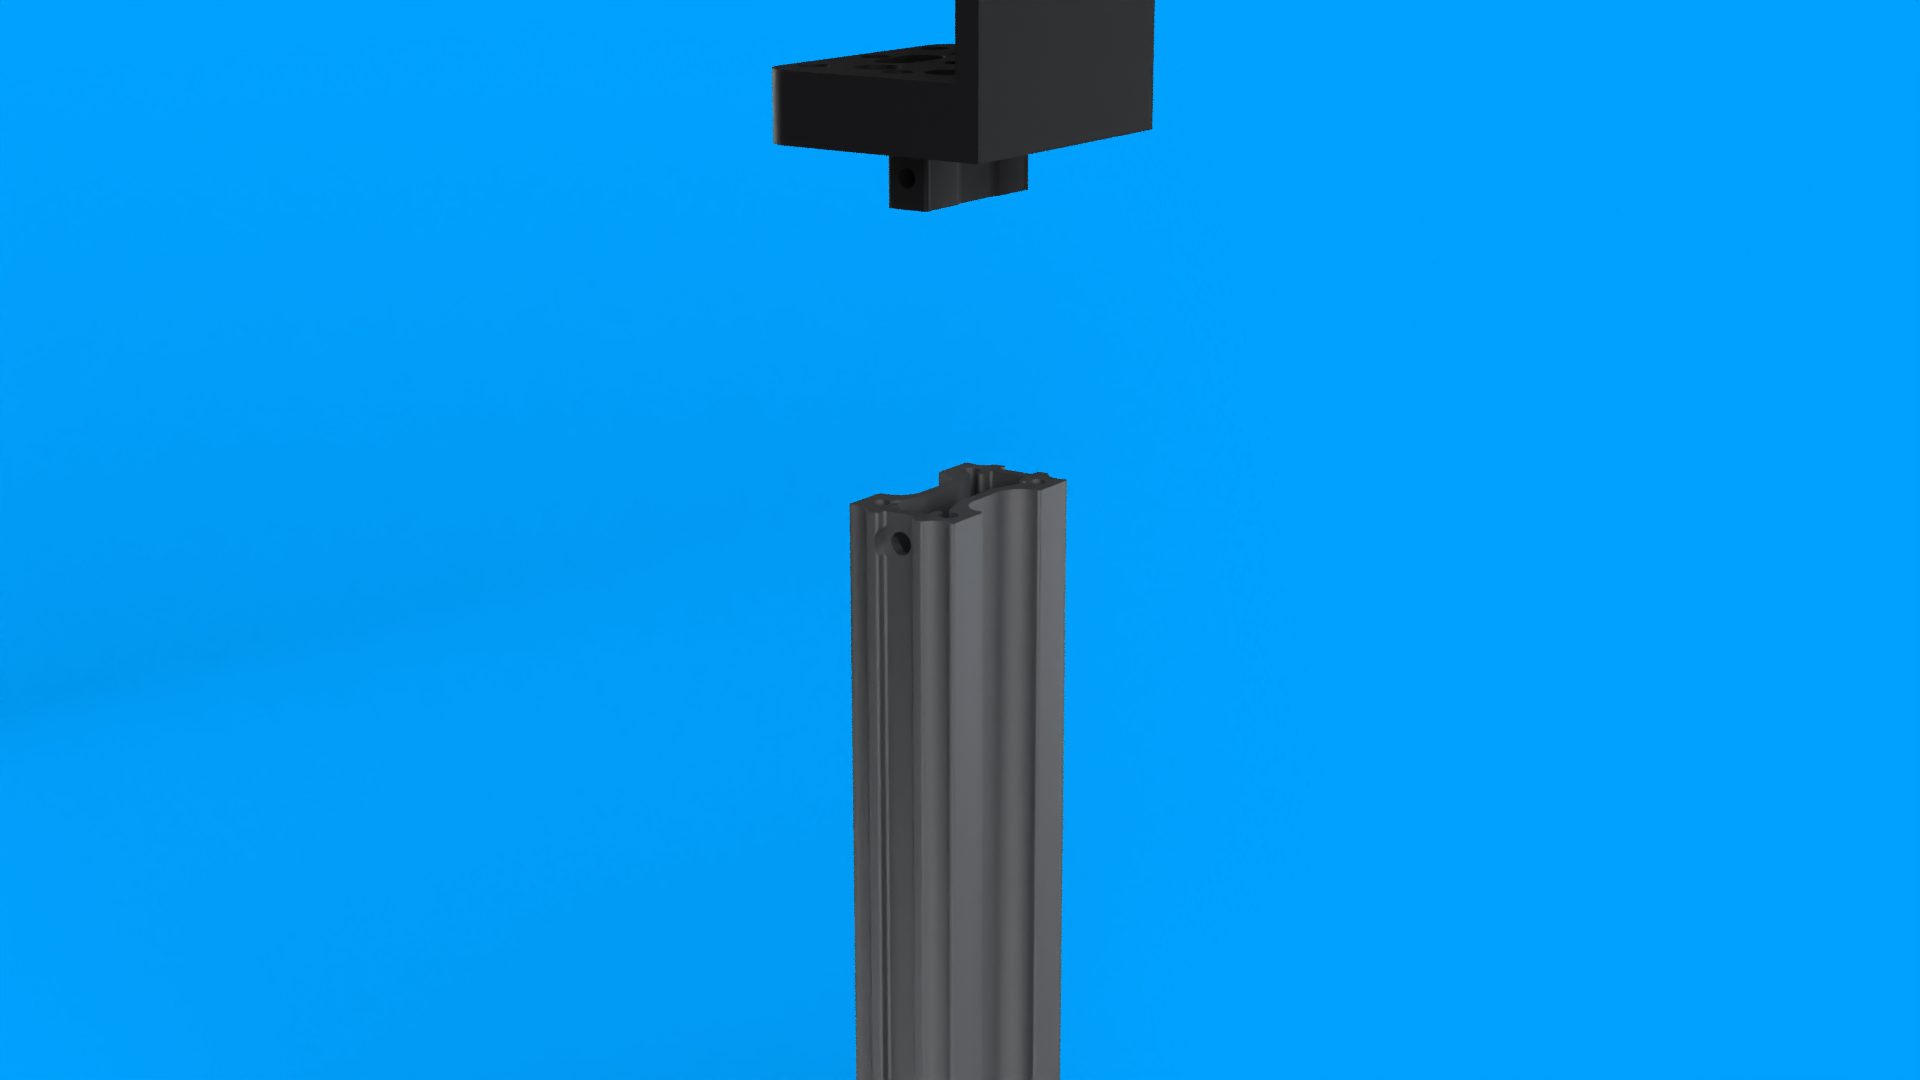
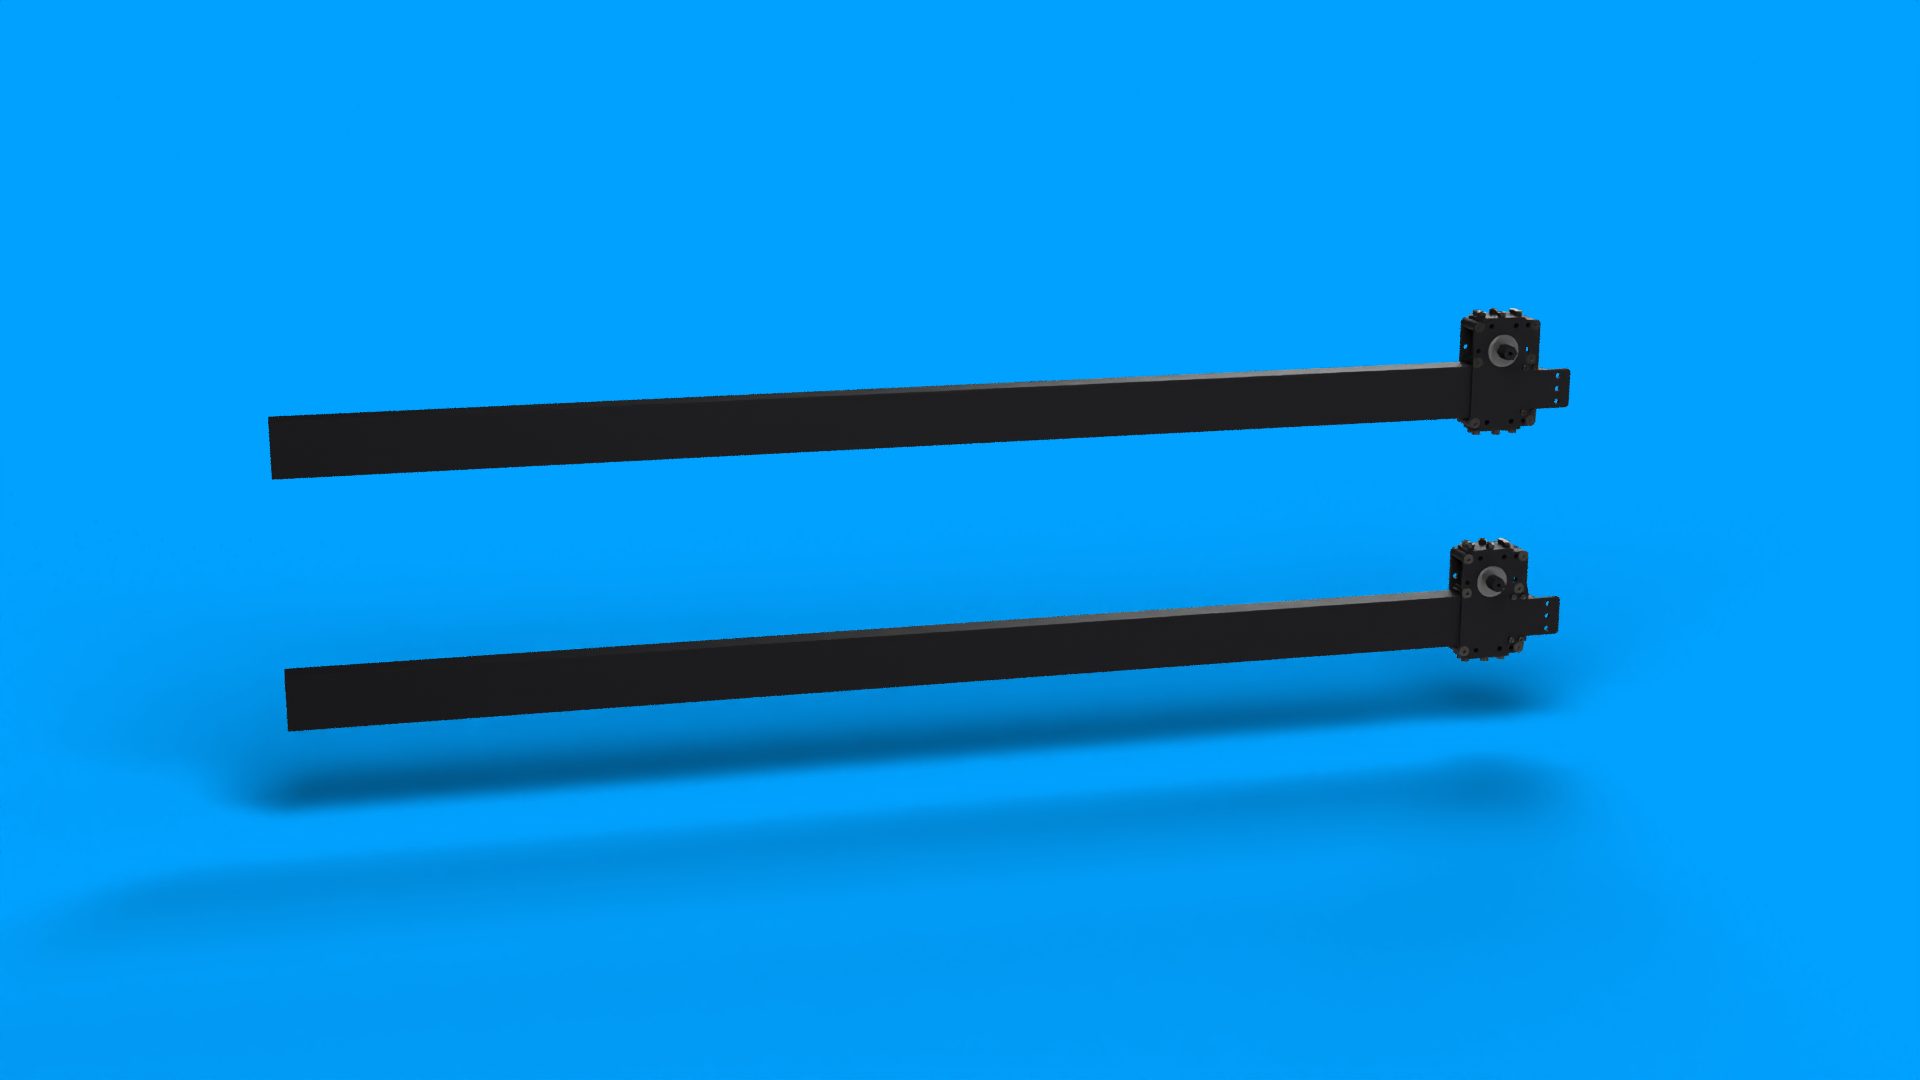
Includes all necessary components for 2 stages except for a motor (and its gearbox).
SWYFT Ascend FRC Telescoping Elevator V2 builds on the success of V1 with upgrades for even greater torque, load capacity, and reliability. Dominate the field with a lighter, stronger, and more customizable elevator system.
 200lb Load Test Video
Assembly Video
Assembly Guide (Recommended)
Extension Lengths and CAD Calculator Video Guide
Extension Lengths Calculator
Elevator Speed&Load Calculator (3in Spool for 2 Stage, 1.5in Spool for 1 Stage)
Spare Parts
Compare elevators
Both are 2-stage with a rope-driven second stage. Open the full compare

You’re viewing this one

This guide covers building the SWYFT Ascend FRC Telescoping Elevator V2. The steps show the two-stage build. The one-stage build uses the same parts minus the inner tube and ropes. Notes marked One-stage build tell you what to skip, and the One-stage build section at the end sums it up.
| SKU | SR-ASCEND-V2 |
| Stages | Ships with parts for two stages. Build it as one or two stages. |
| Collapsed length | 8 in to 47 in, set by how you cut the tubes |
| Drive | 1/2 in hex axle. Motor and gearbox not included. |
| Item | Notes |
|---|---|
| 1/8 in Allen key, 5/32 in Allen key, 2.5 mm Allen key, 2.5 mm driver bit | Included |
| Drill or driver | For the M3 and 10-32 screws. Use a low clutch setting. |
| Saw for aluminum | A chop saw works well for cutting the tubes |
| Tape measure and marker | For marking the tubes and ropes |
| Pliers | For pulling the rope through small holes |
| Blue Loctite | For the screws noted in the steps |
| Grease | For the ball channels in step 20. White lithium grease works well. |
| Small mallet | Only if a bearing won't go in by hand (step 11) |
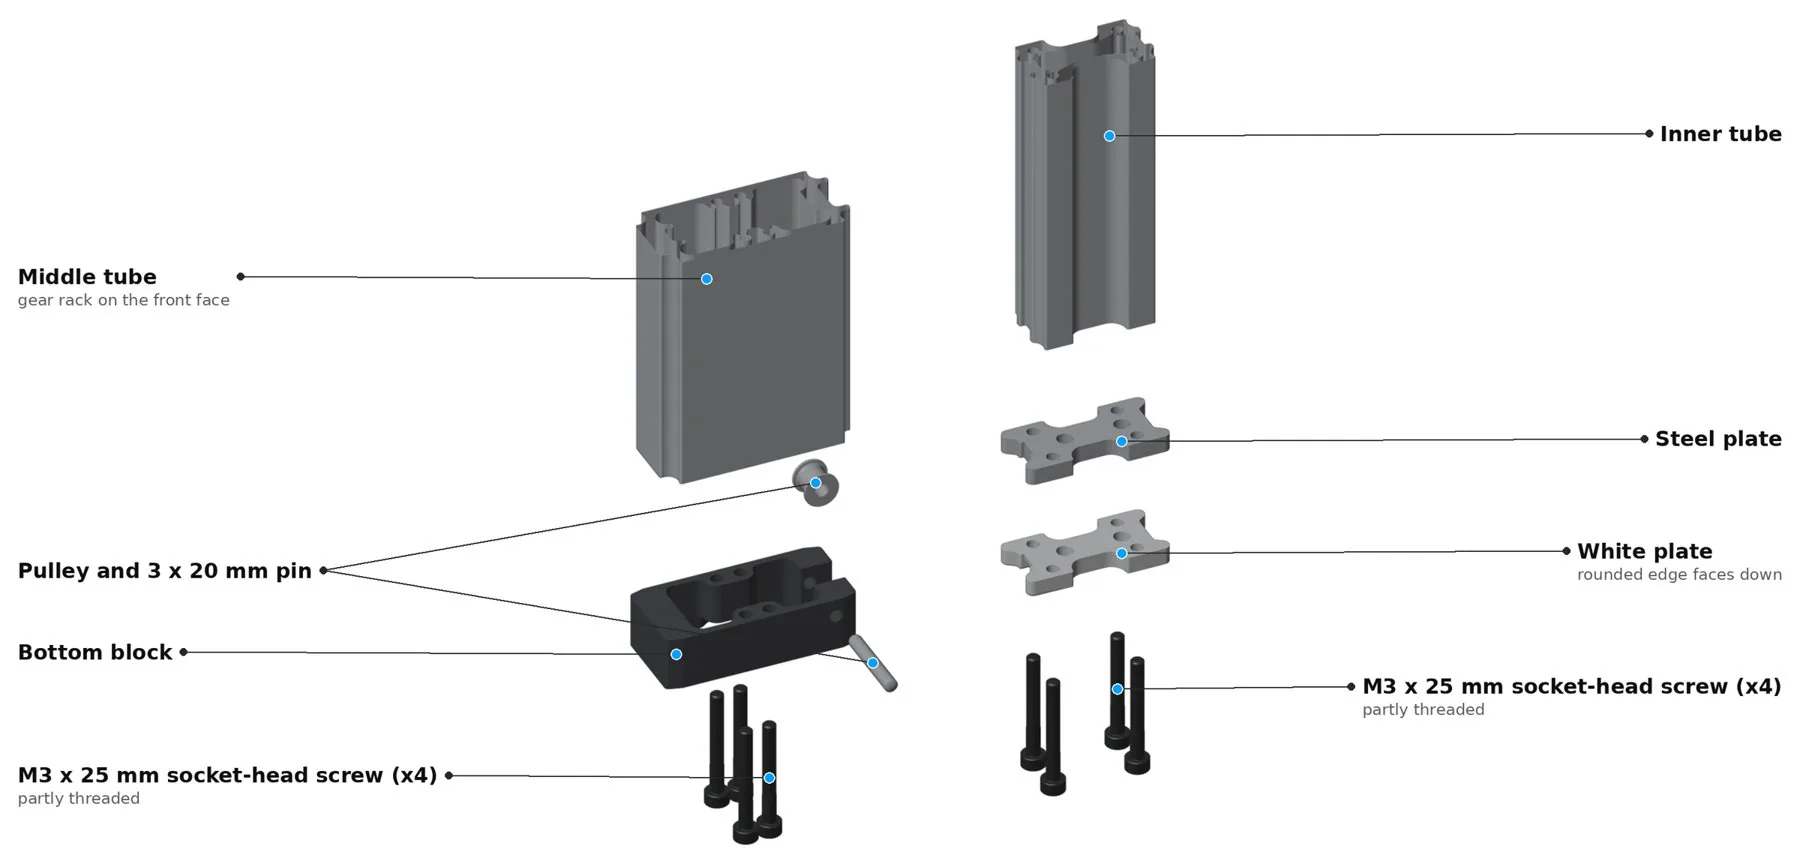
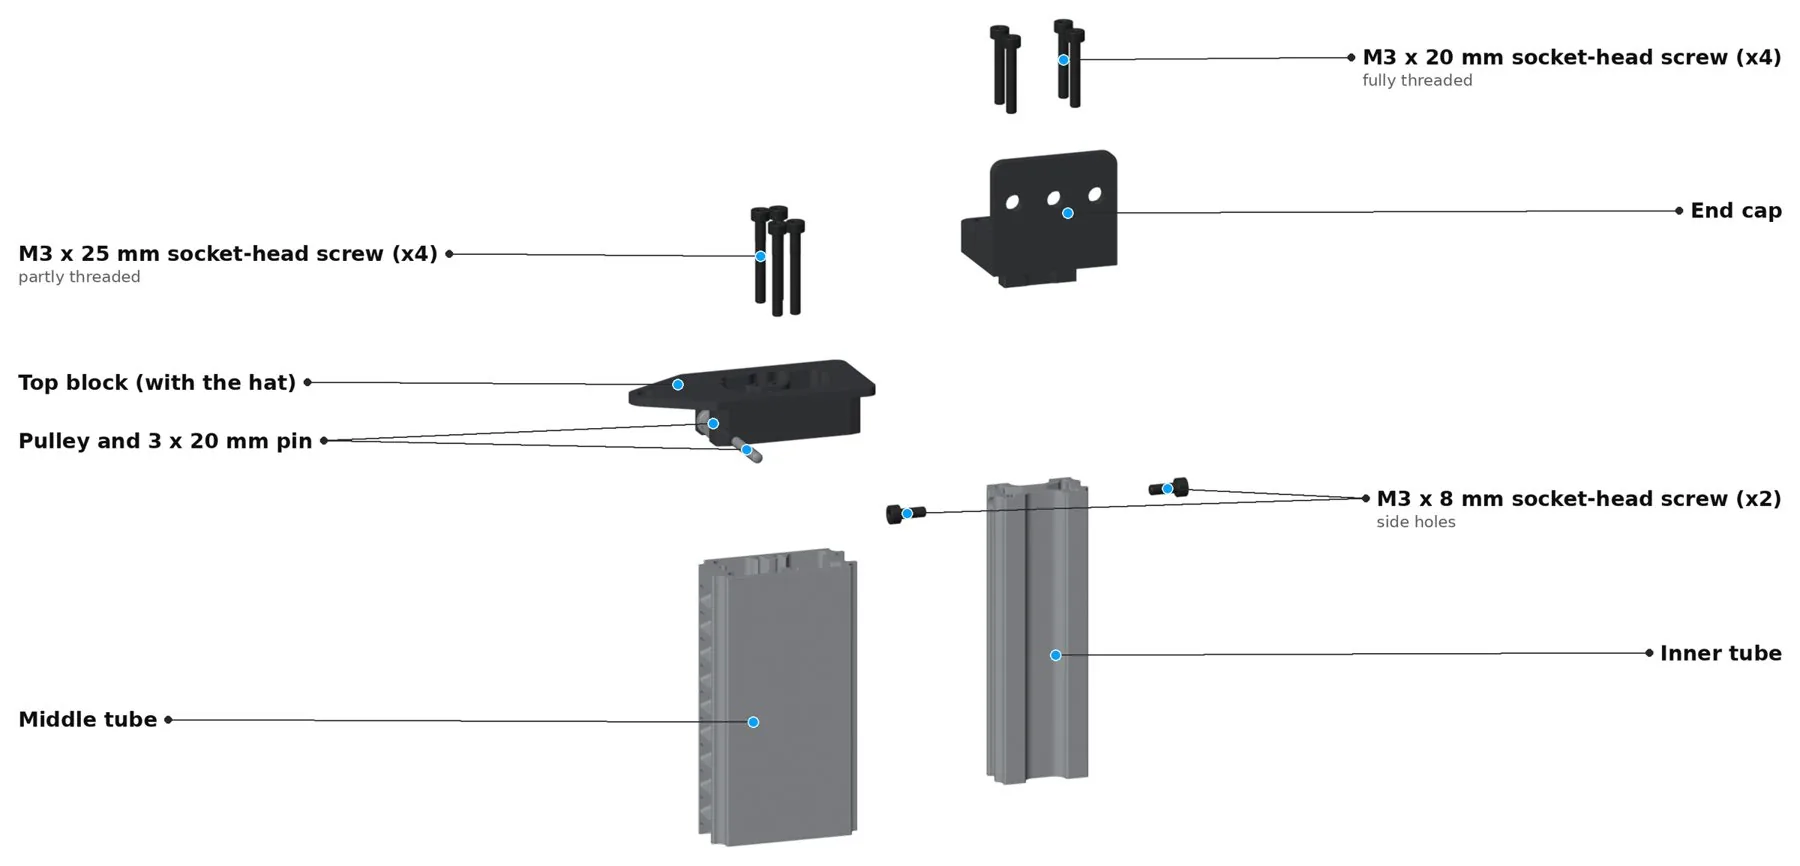
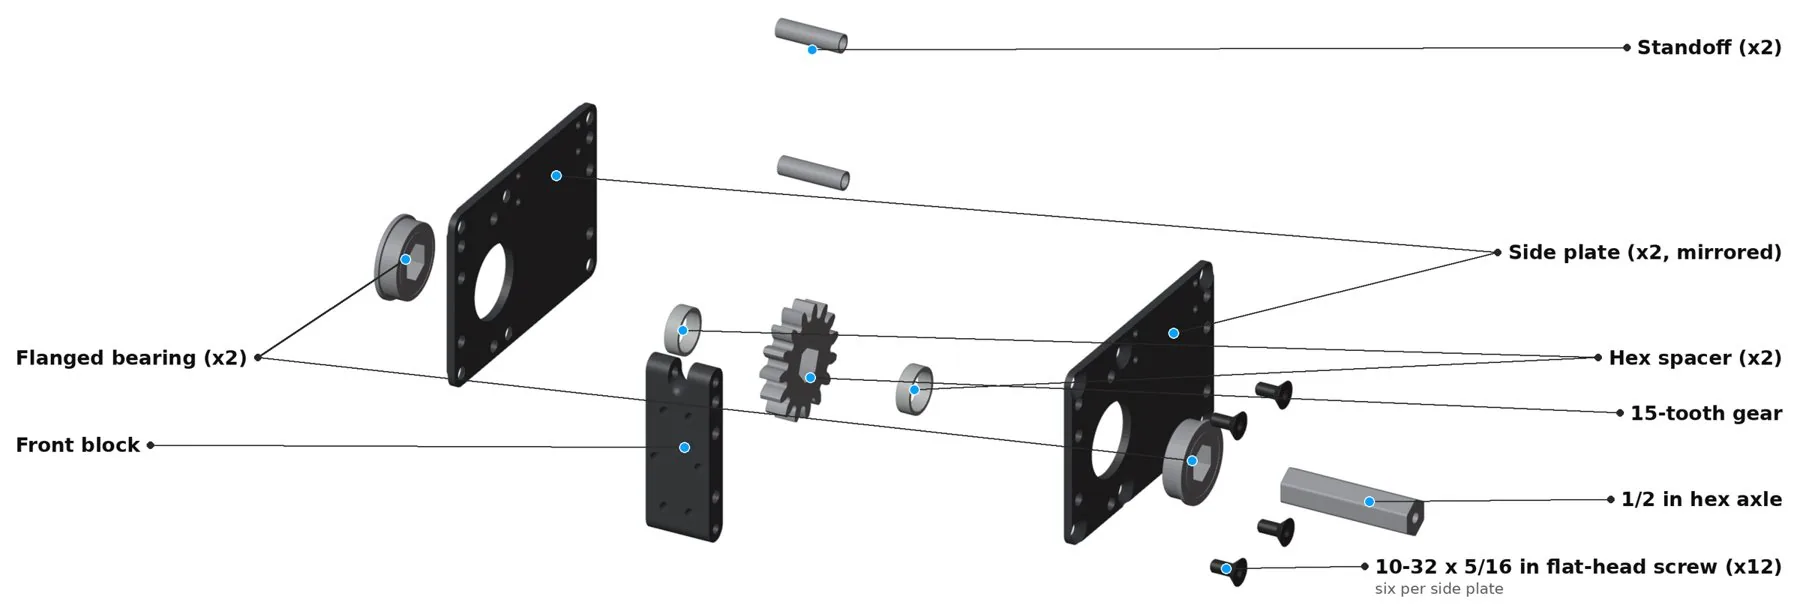
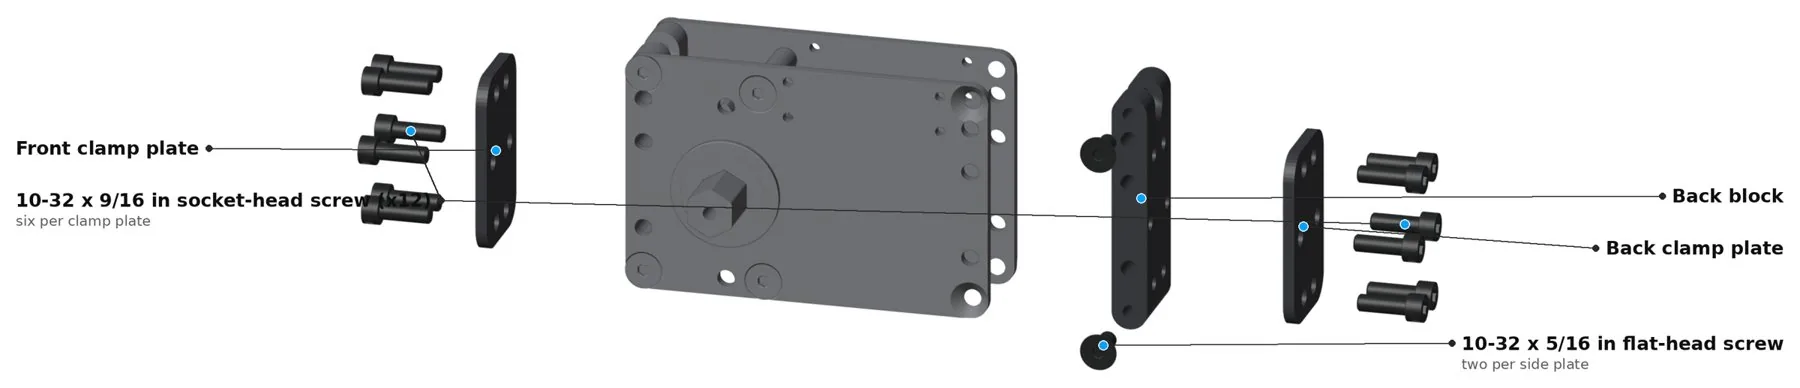
The kit also has the outer tube (black), two ropes, the steel balls, and M3 x 5 mm and M3 x 8 mm screws that hold the gearbox on the tube (step 15).
In the step pictures, blue = parts you add in that step, grey = parts already in place, and the orange arrow shows which way a part moves. The lift rope is pink and the return rope is green.
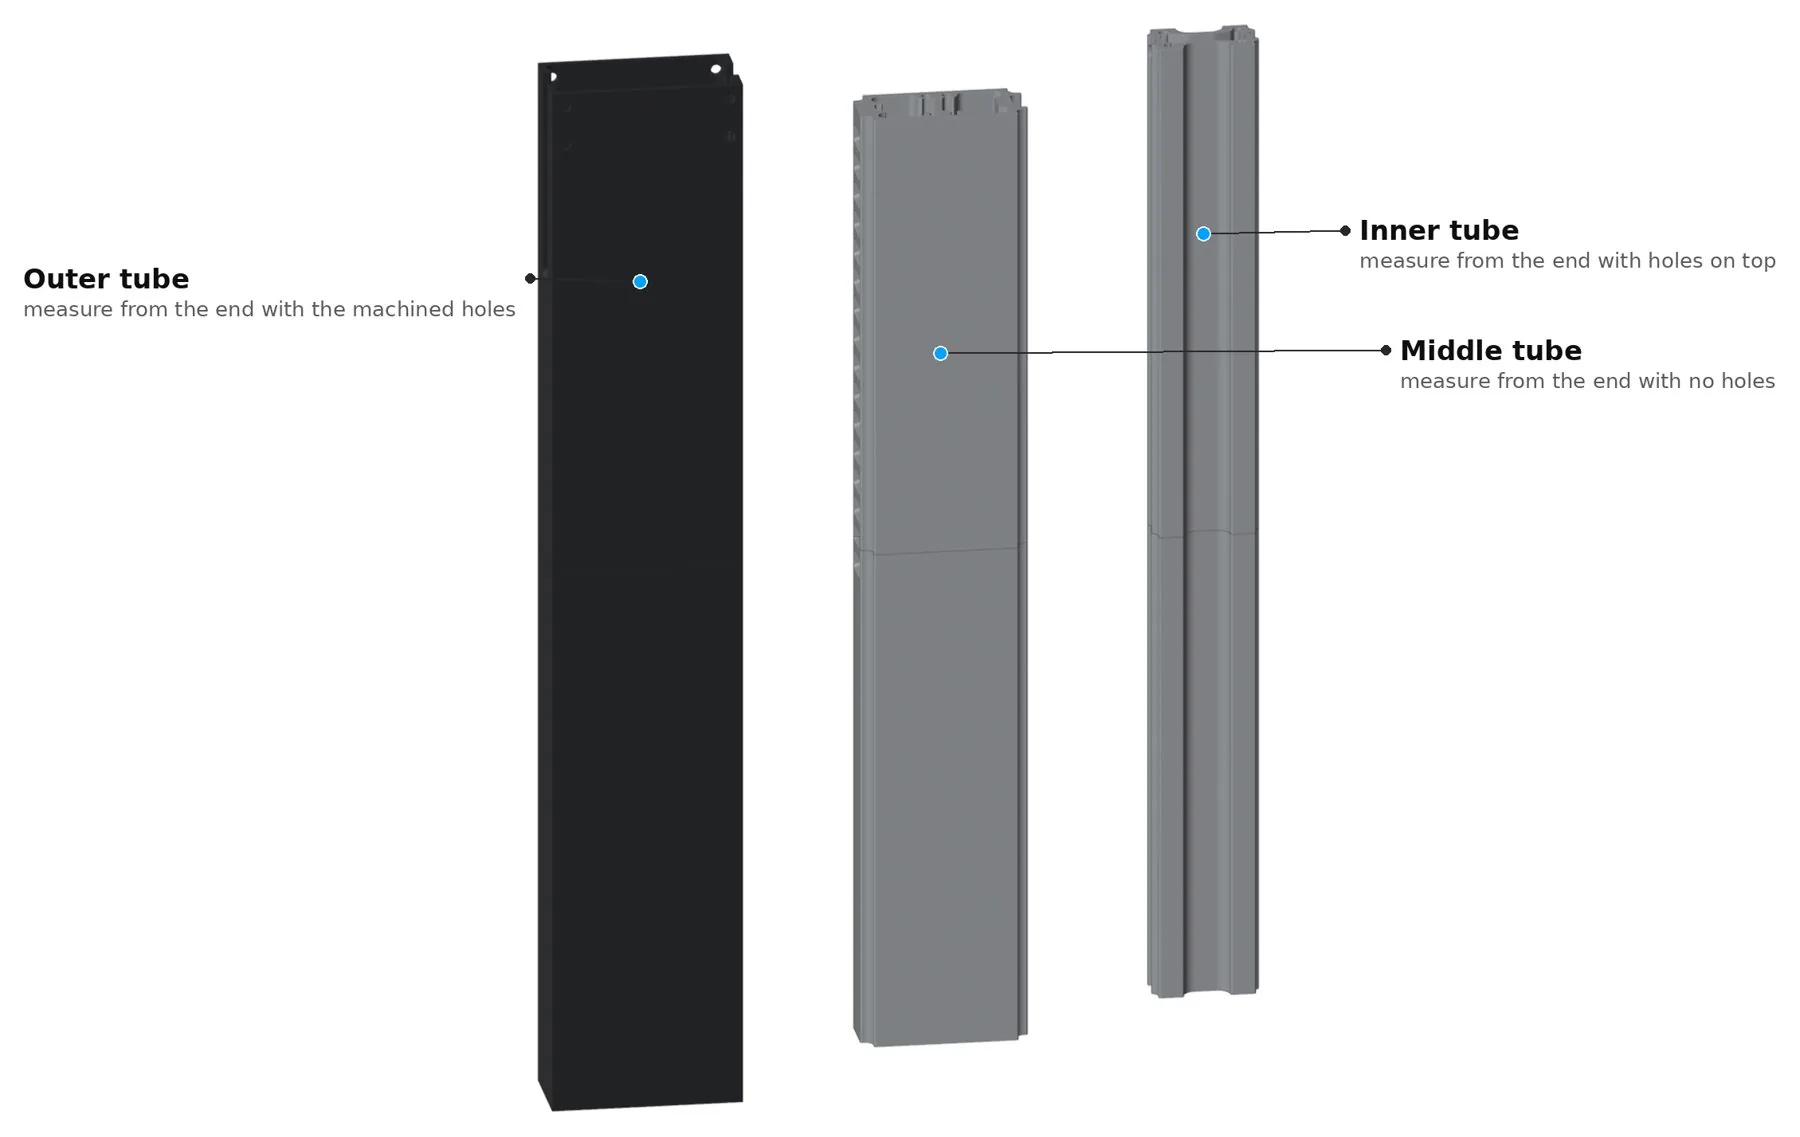
Mark each tube at the length from the calculator, then cut it.
Within about 1/8 in is fine.
One-stage build: cut only the outer and middle tubes.
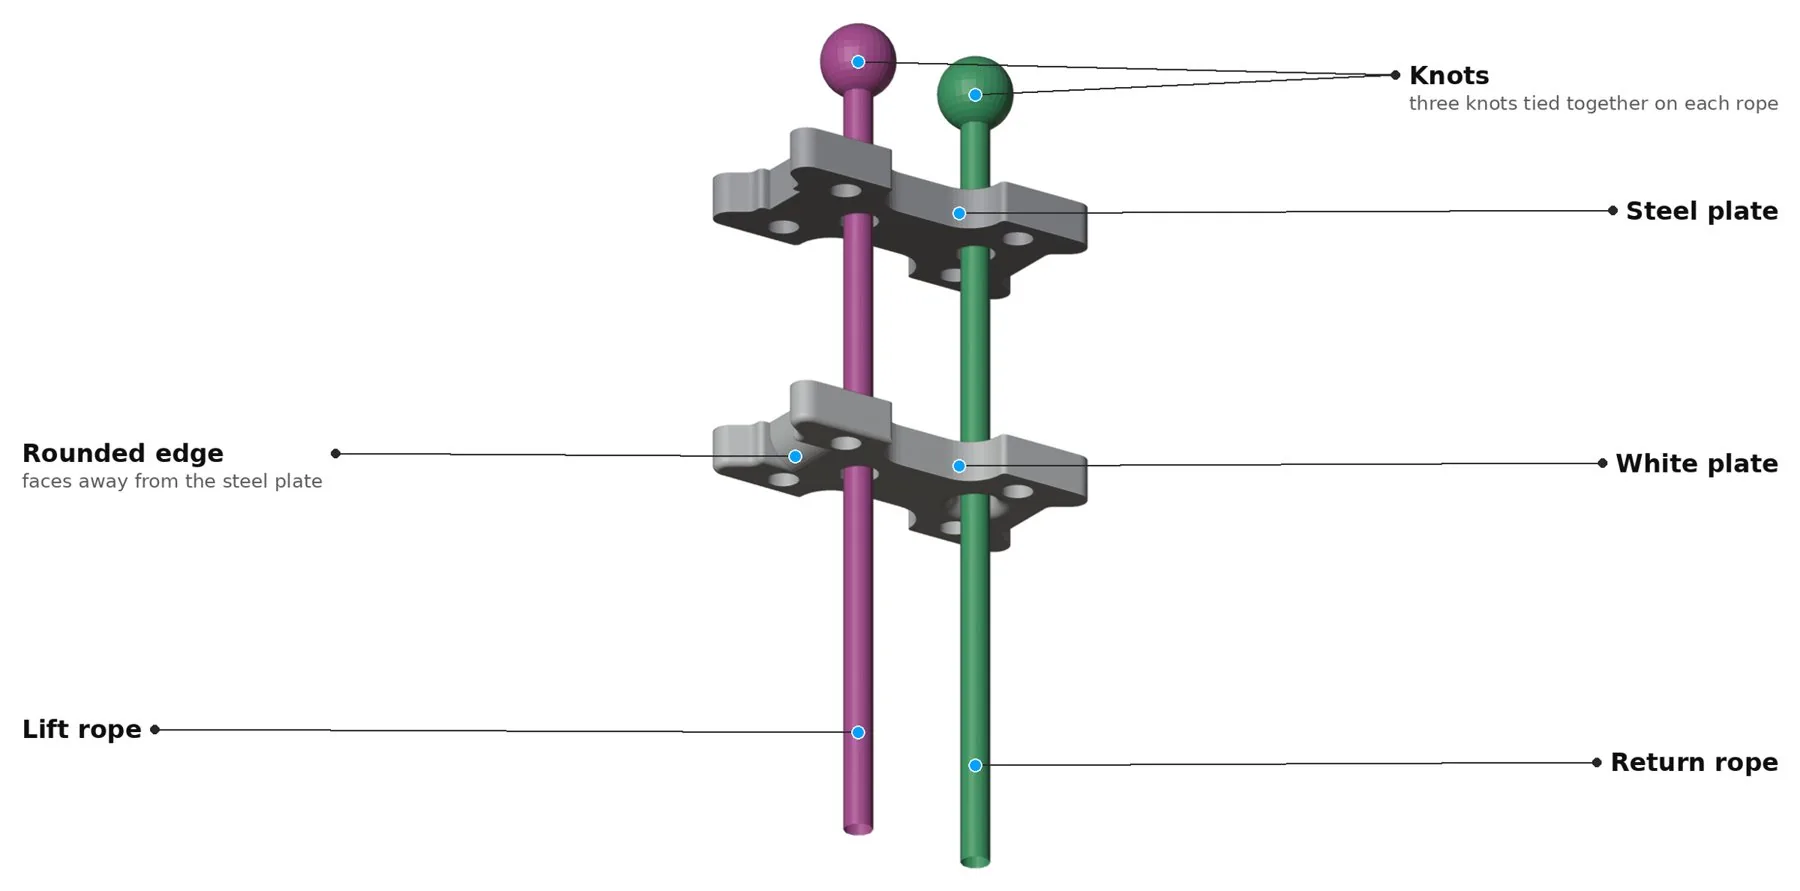
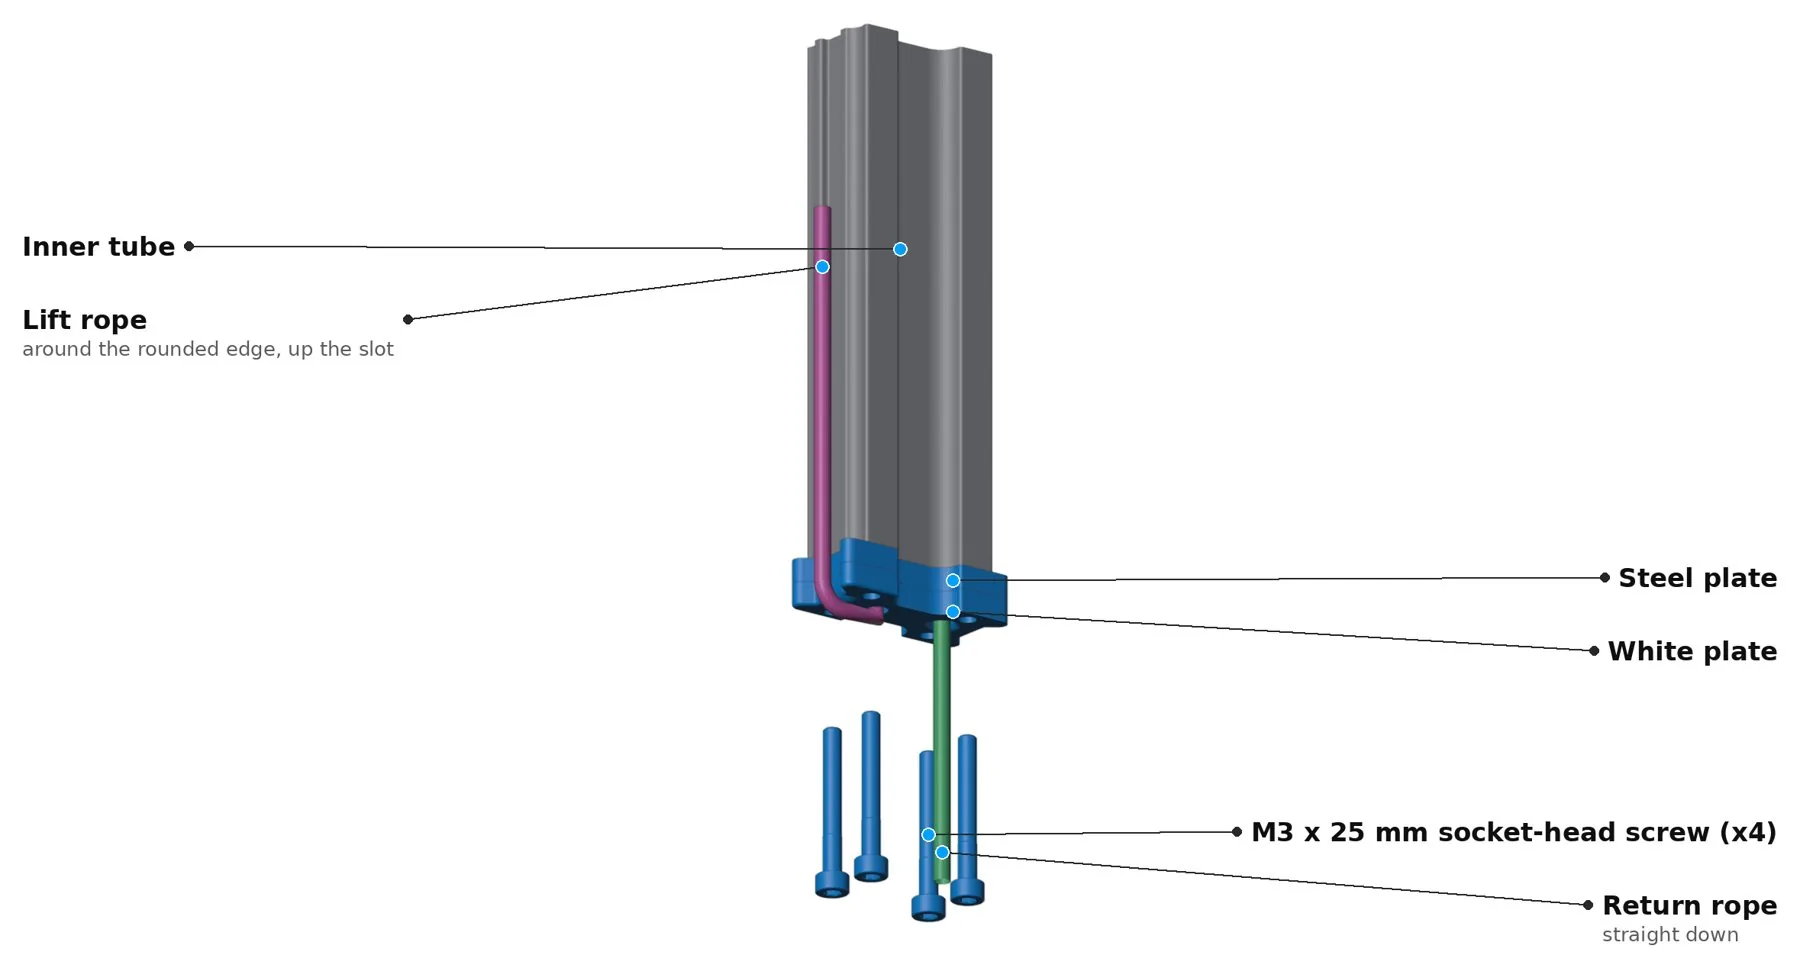
The rope in the hole next to the rounded edge is the lift rope (pink). The other one is the return rope (green).
One-stage build: skip steps 2 and 3.
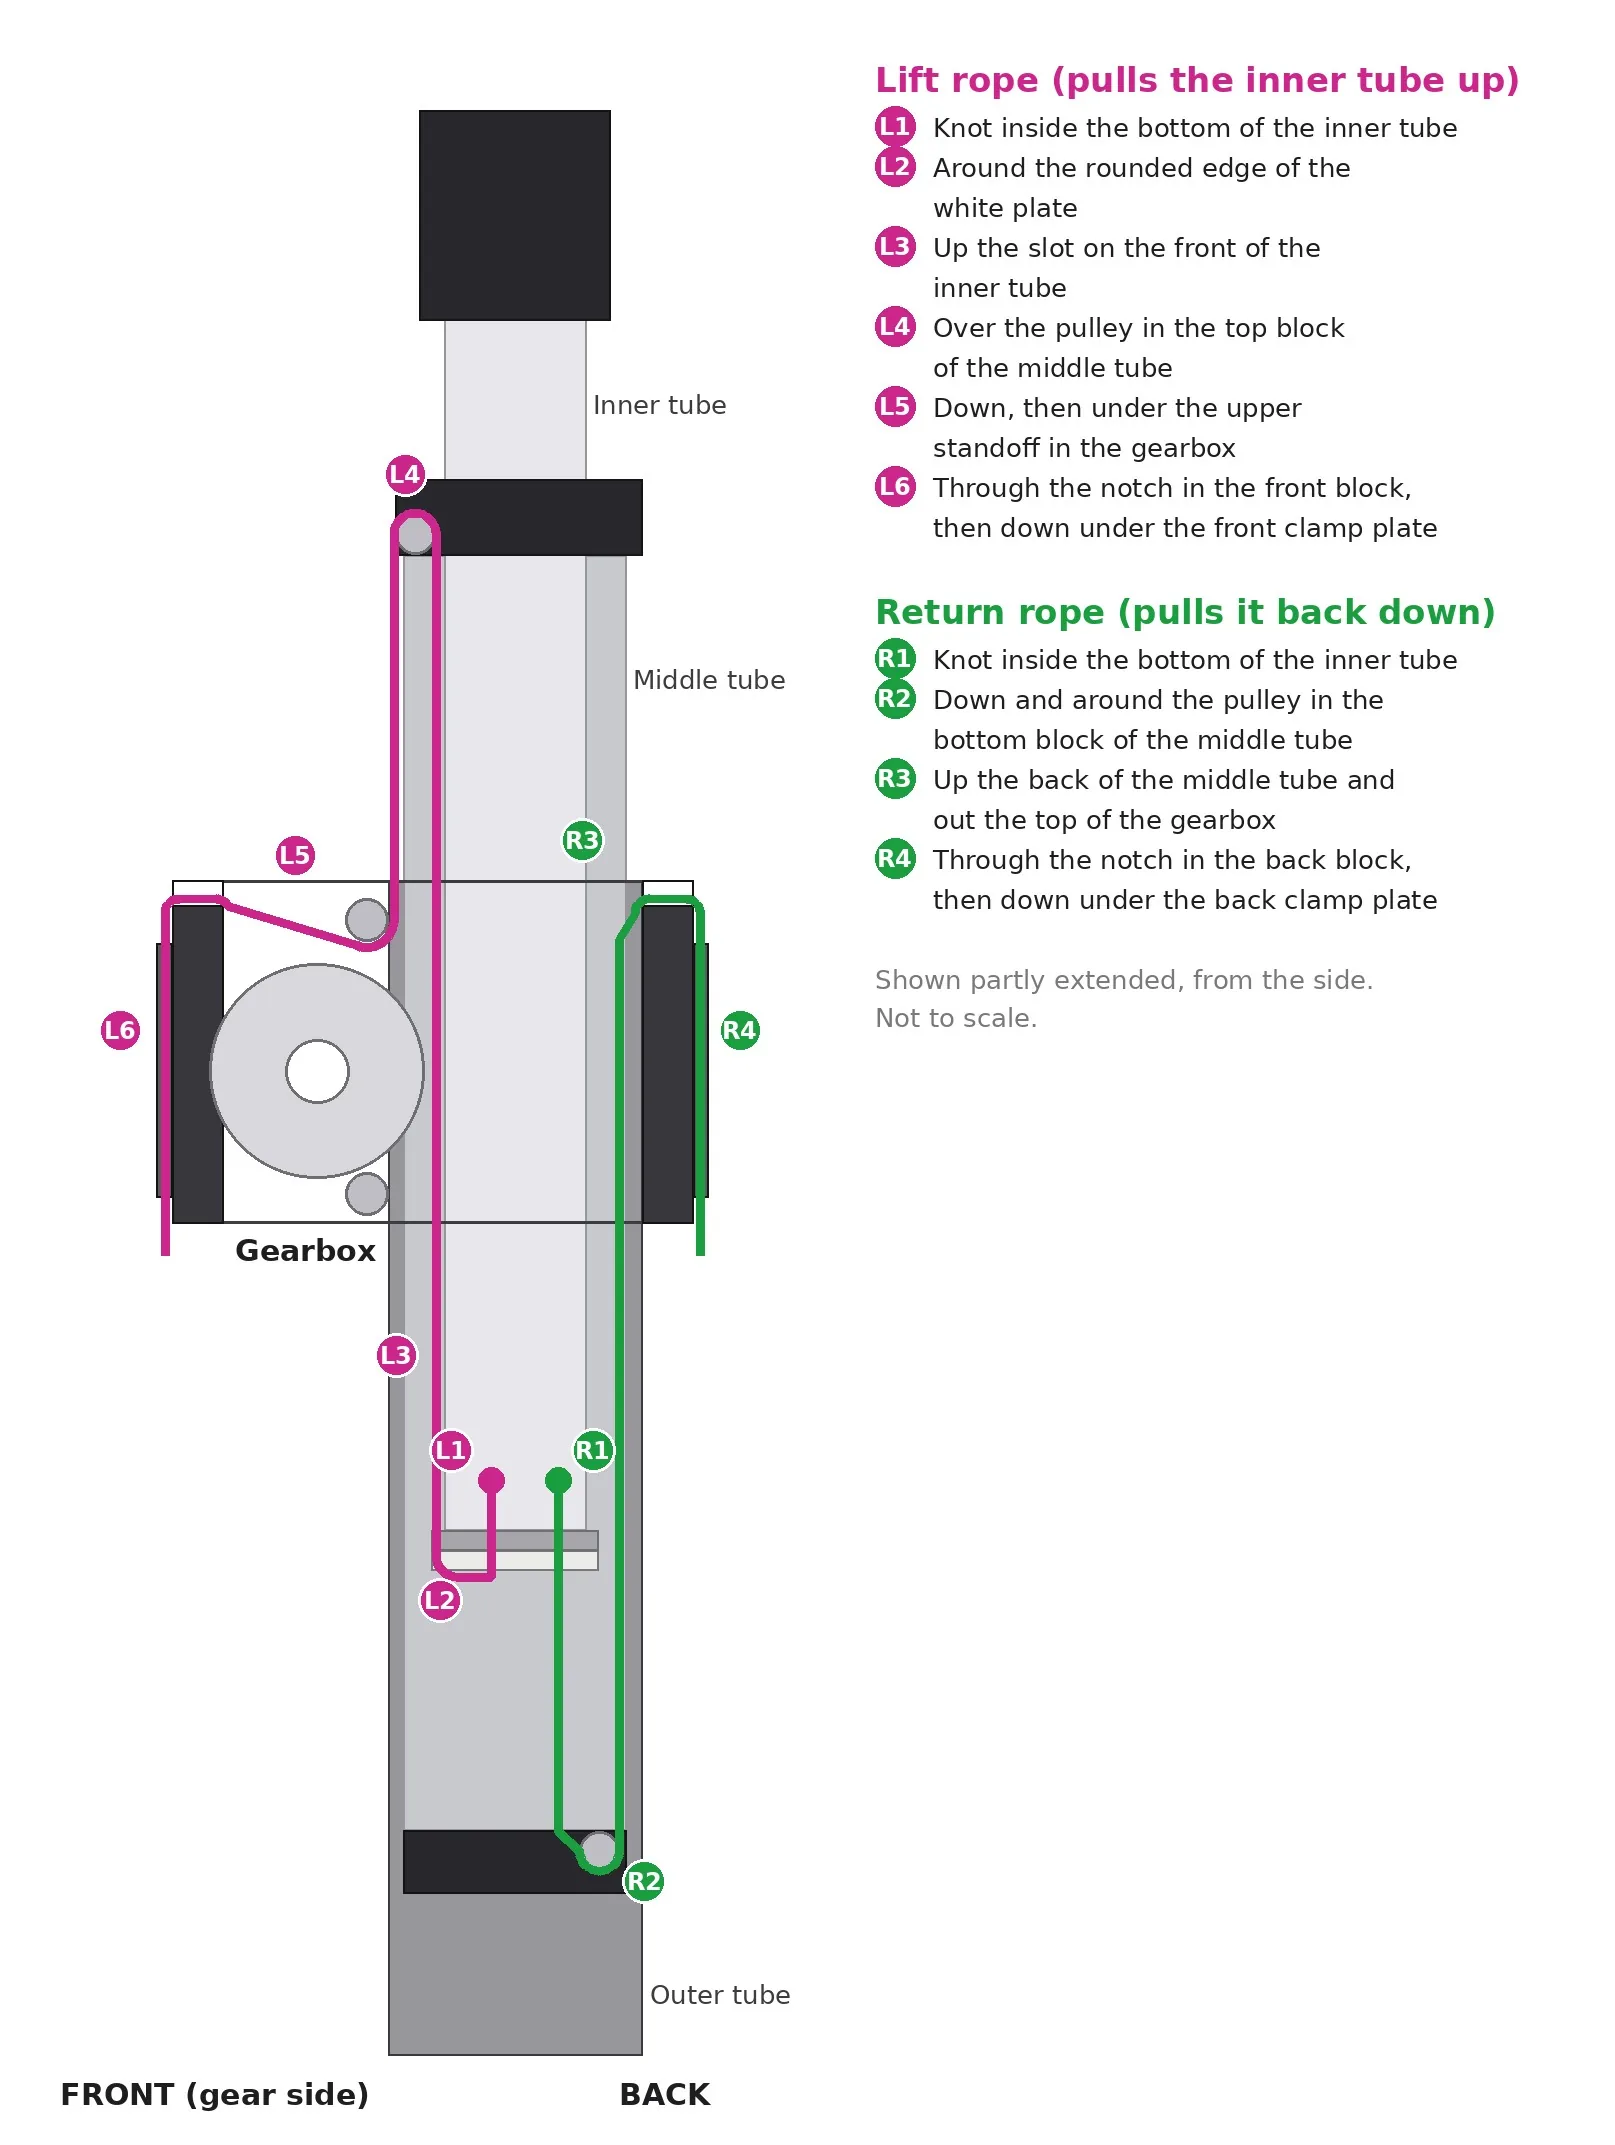
The two ropes make the inner tube follow the middle tube. The lift rope (pink) pulls the inner tube up and the return rope (green) pulls it back down. You don't have to build all of this now. This is the rope layout you'll end up with. The steps below build it one piece at a time and refer to these numbers.
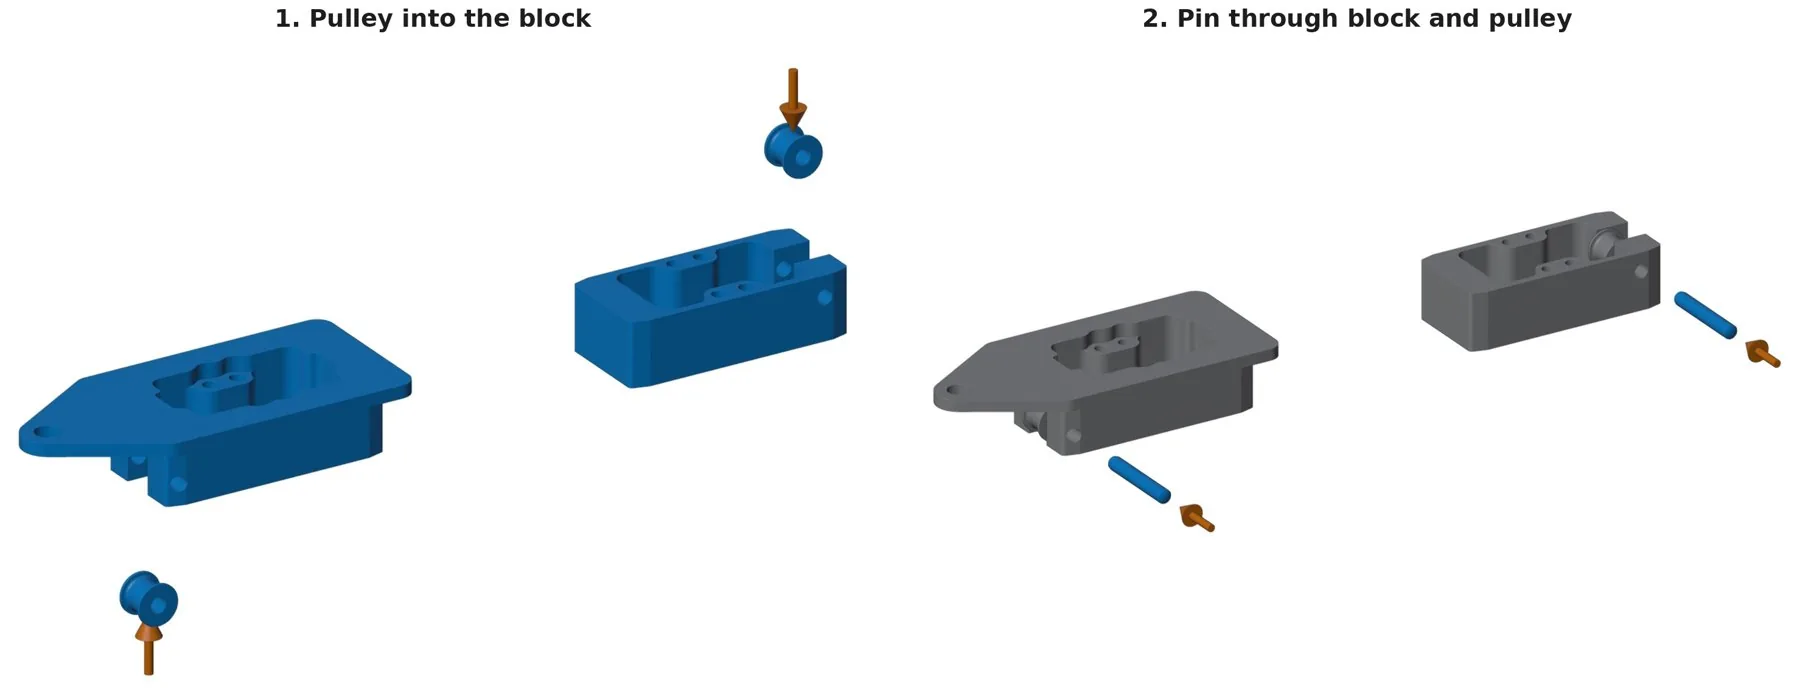
There are two pulley blocks: the bottom block and the top block (the one with the hat). Each gets one small steel pulley and one 3 x 20 mm steel pin.
One-stage build: build only the bottom block.
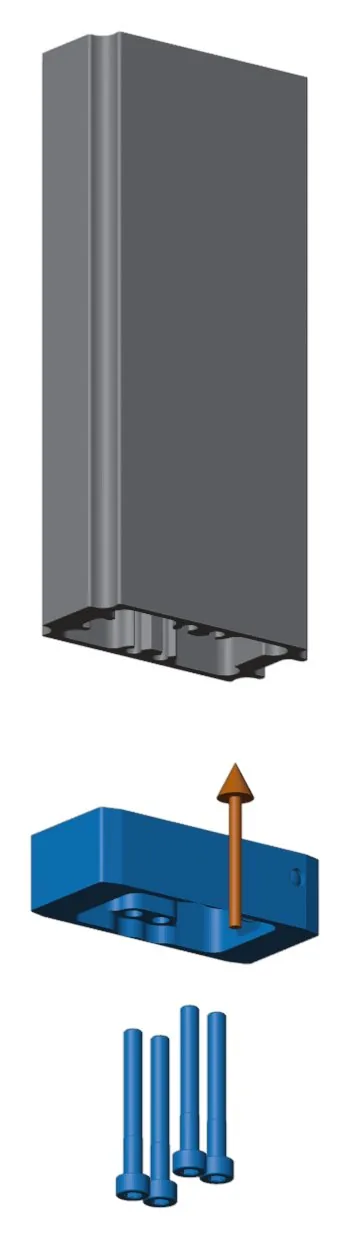
This step is easy to get backward. Check the pulley side again before you move on.
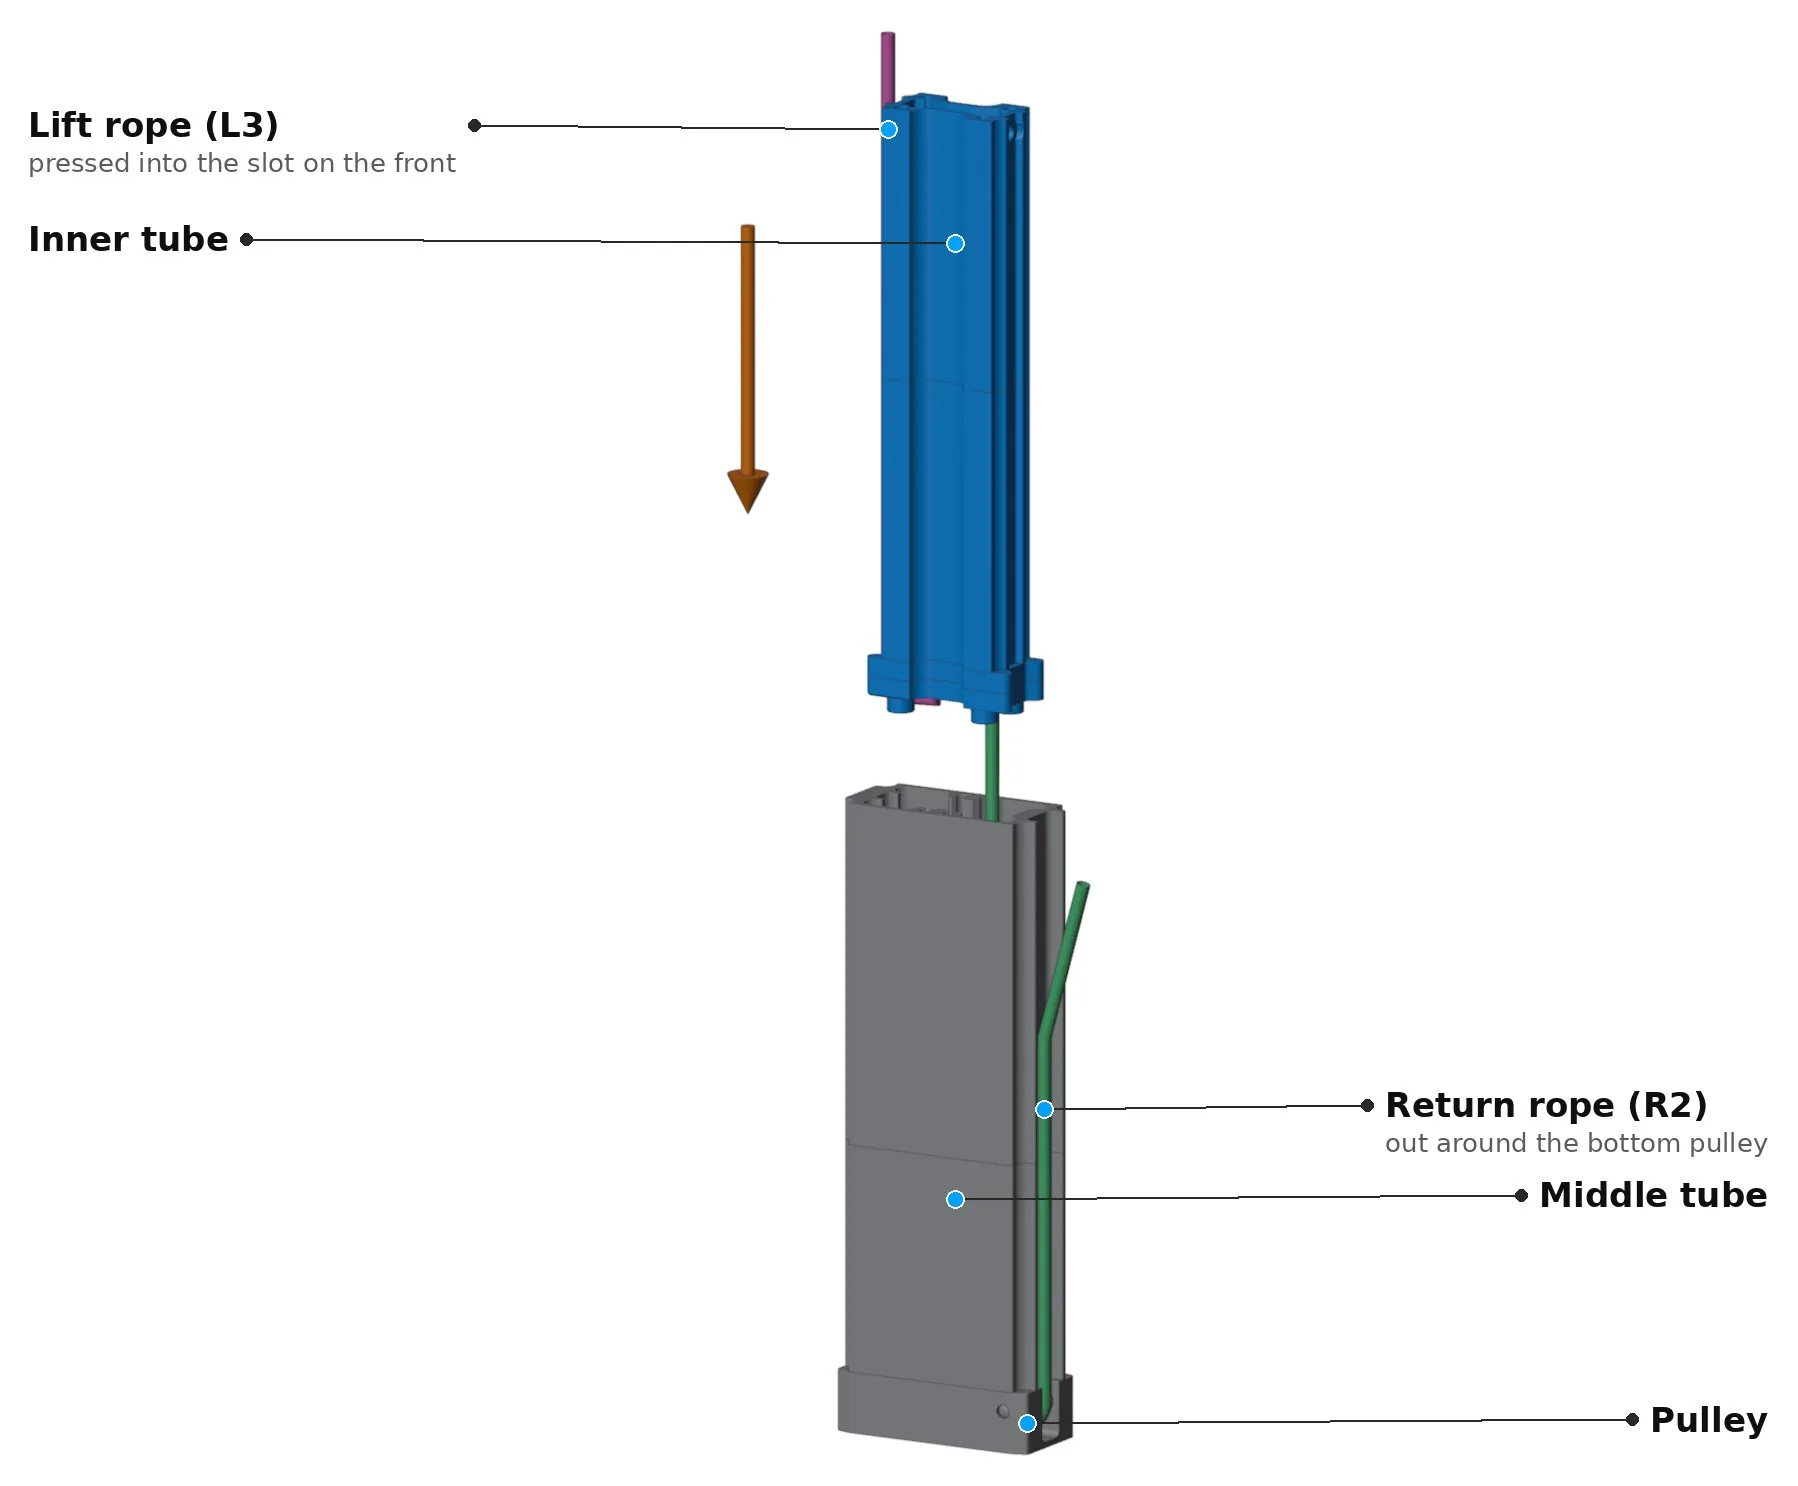
One-stage build: skip this step.
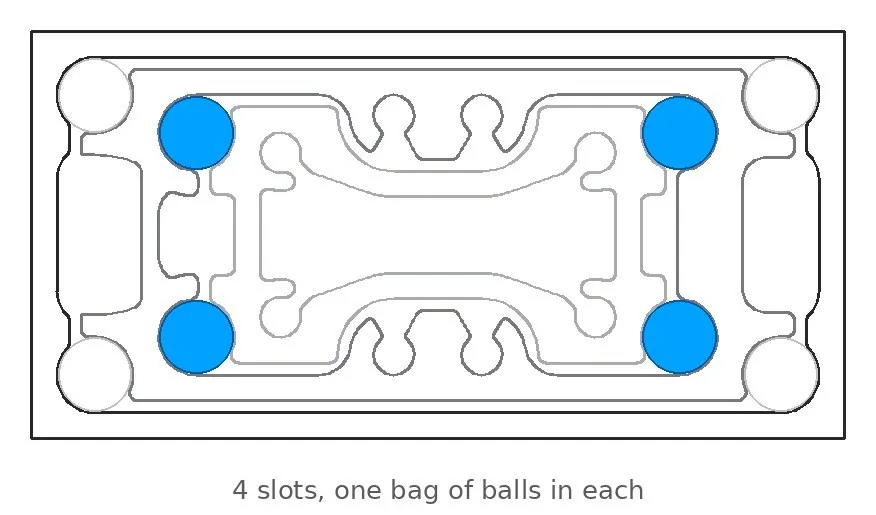
There are four ball slots between the inner and middle tubes.
Losing one or two balls per slot is fine. If you lose more, top it up from a spare bag or tip the stage out and start that stage again.
One-stage build: skip this step.
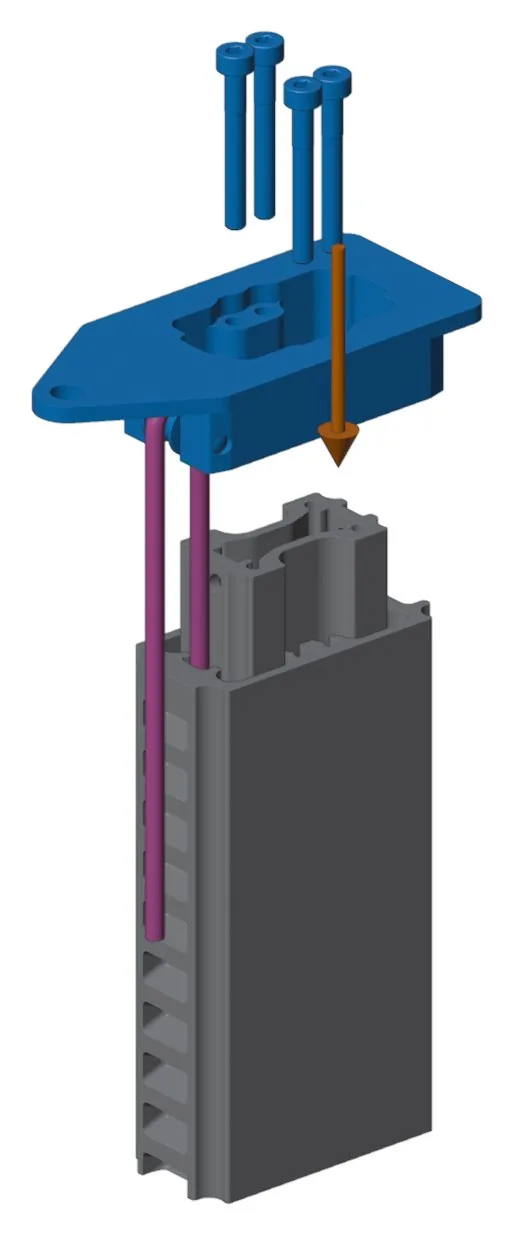
One-stage build: skip this step.

The outer tube has a big slot on one side and a smaller slot on the other. The gear rack on the middle tube goes on the big slot side, because that's where the gear goes.
Hold the return rope in the channel on the back of the middle tube with your finger (R3) and slide the stage into the outer tube.
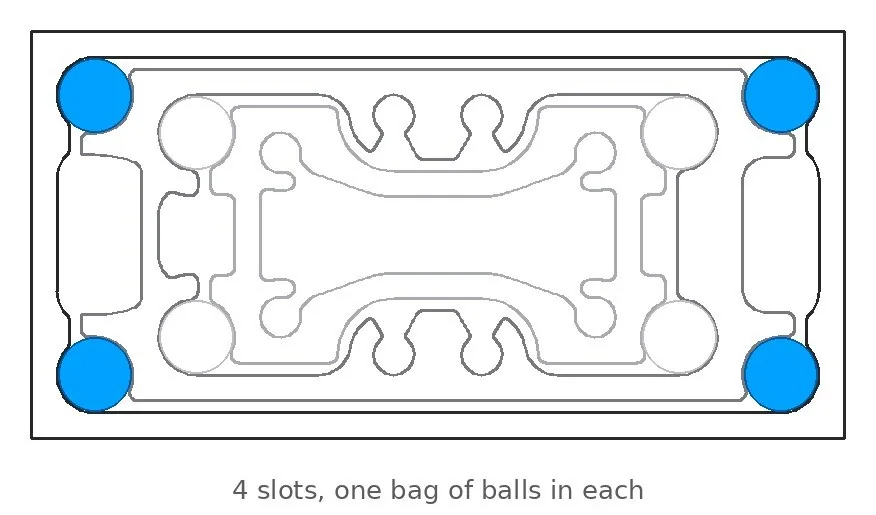
Fill the four slots between the middle and outer tubes the same way as step 7, one bag per slot. Prop the elevator at an angle so the balls roll in.
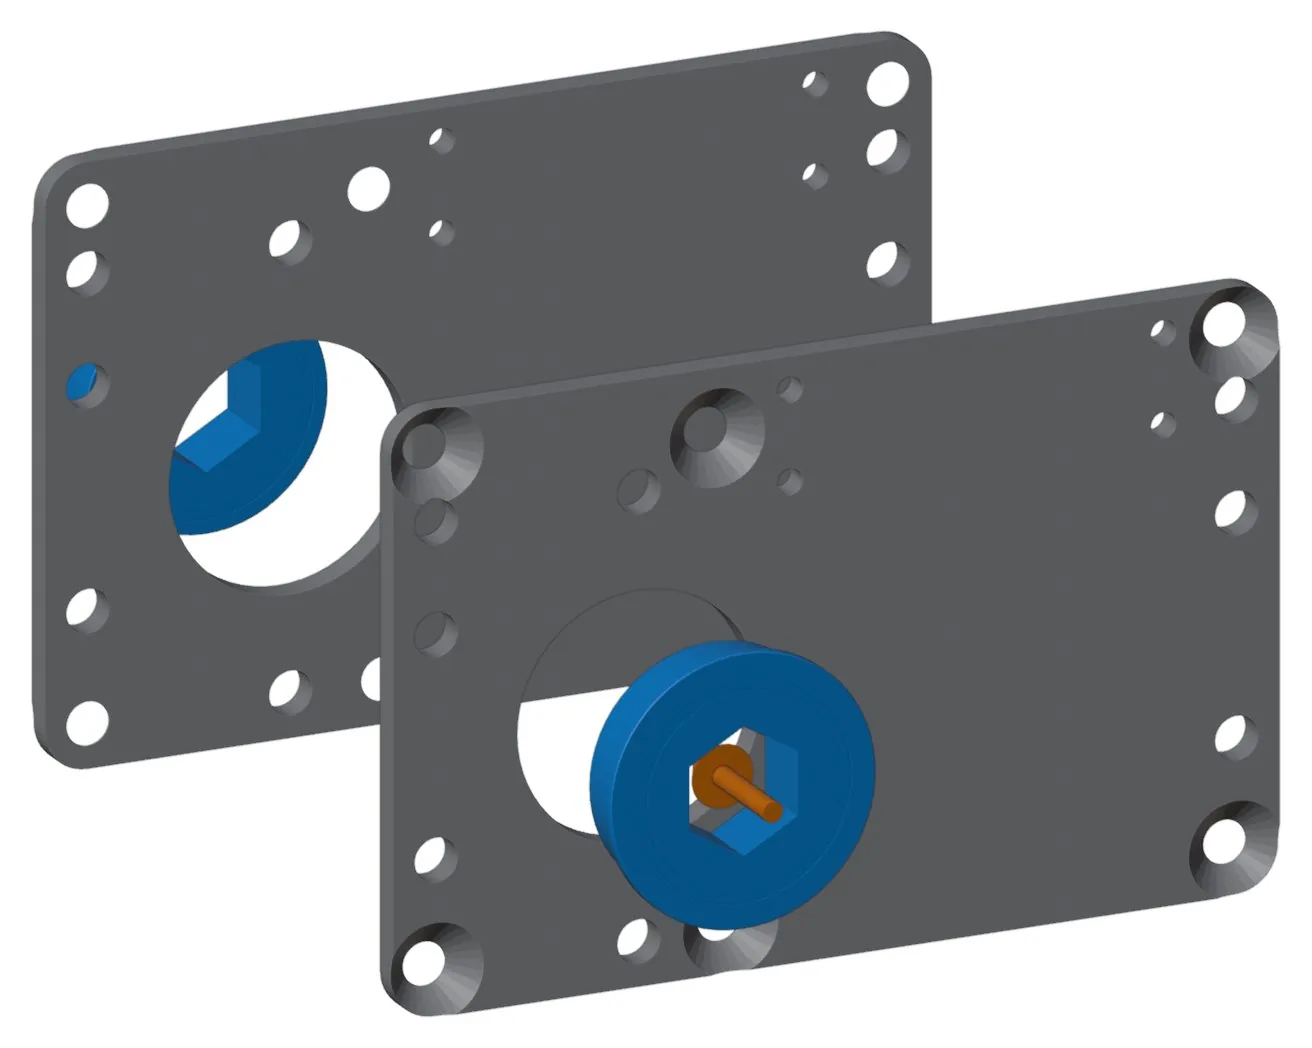
The two side plates are mirror images. Press a flanged bearing into each one with the flange on the same side as the countersunk holes. Most go in by hand. A light tap with a mallet helps a stiff one.
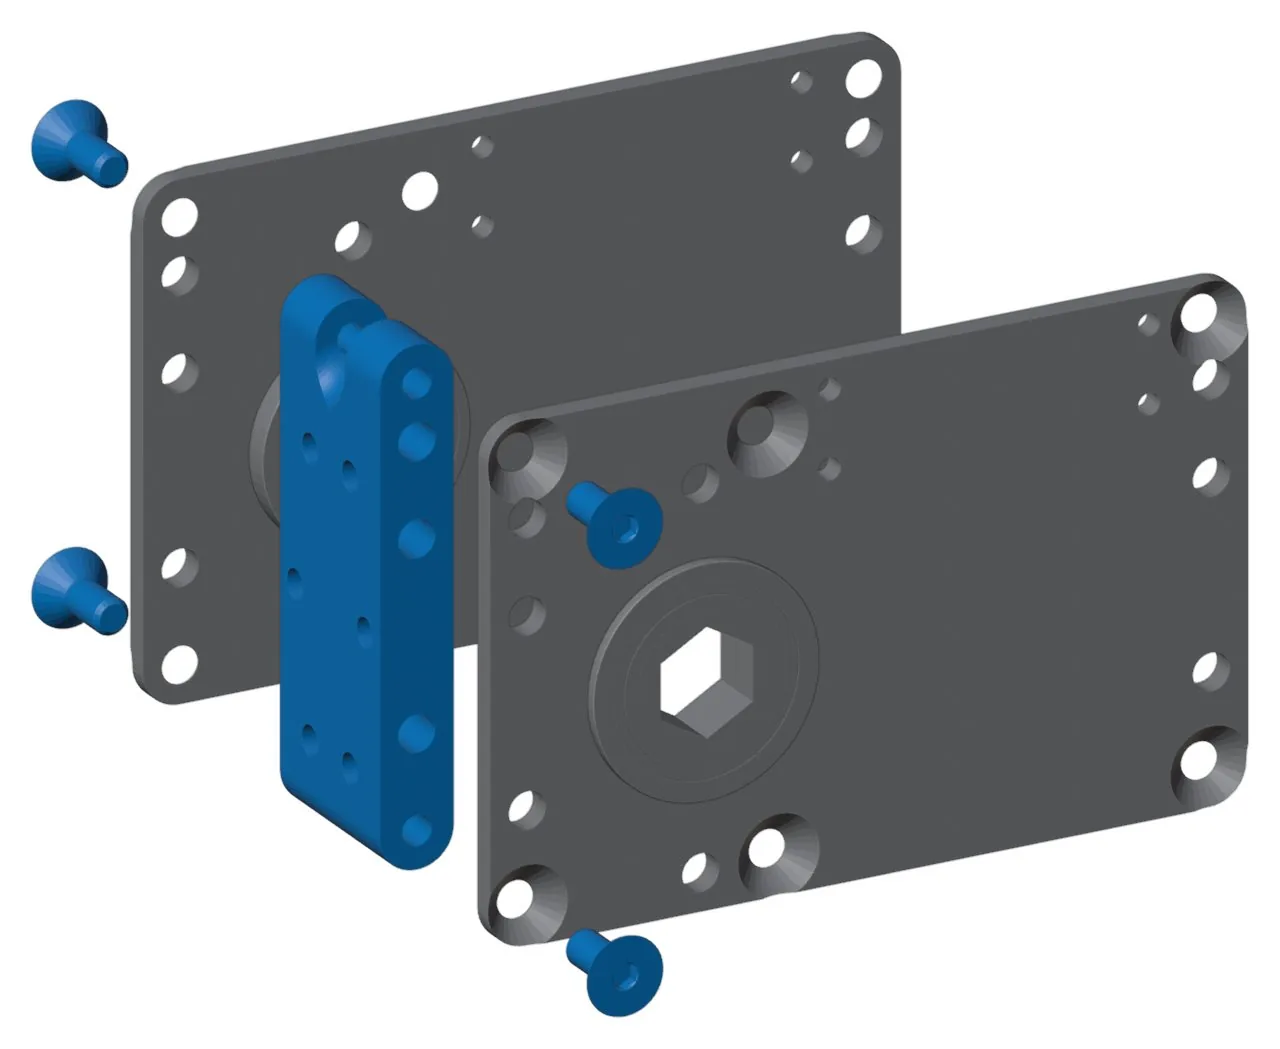
Use the 1/8 in Allen key for the 10-32 x 5/16 in flat-head screws.
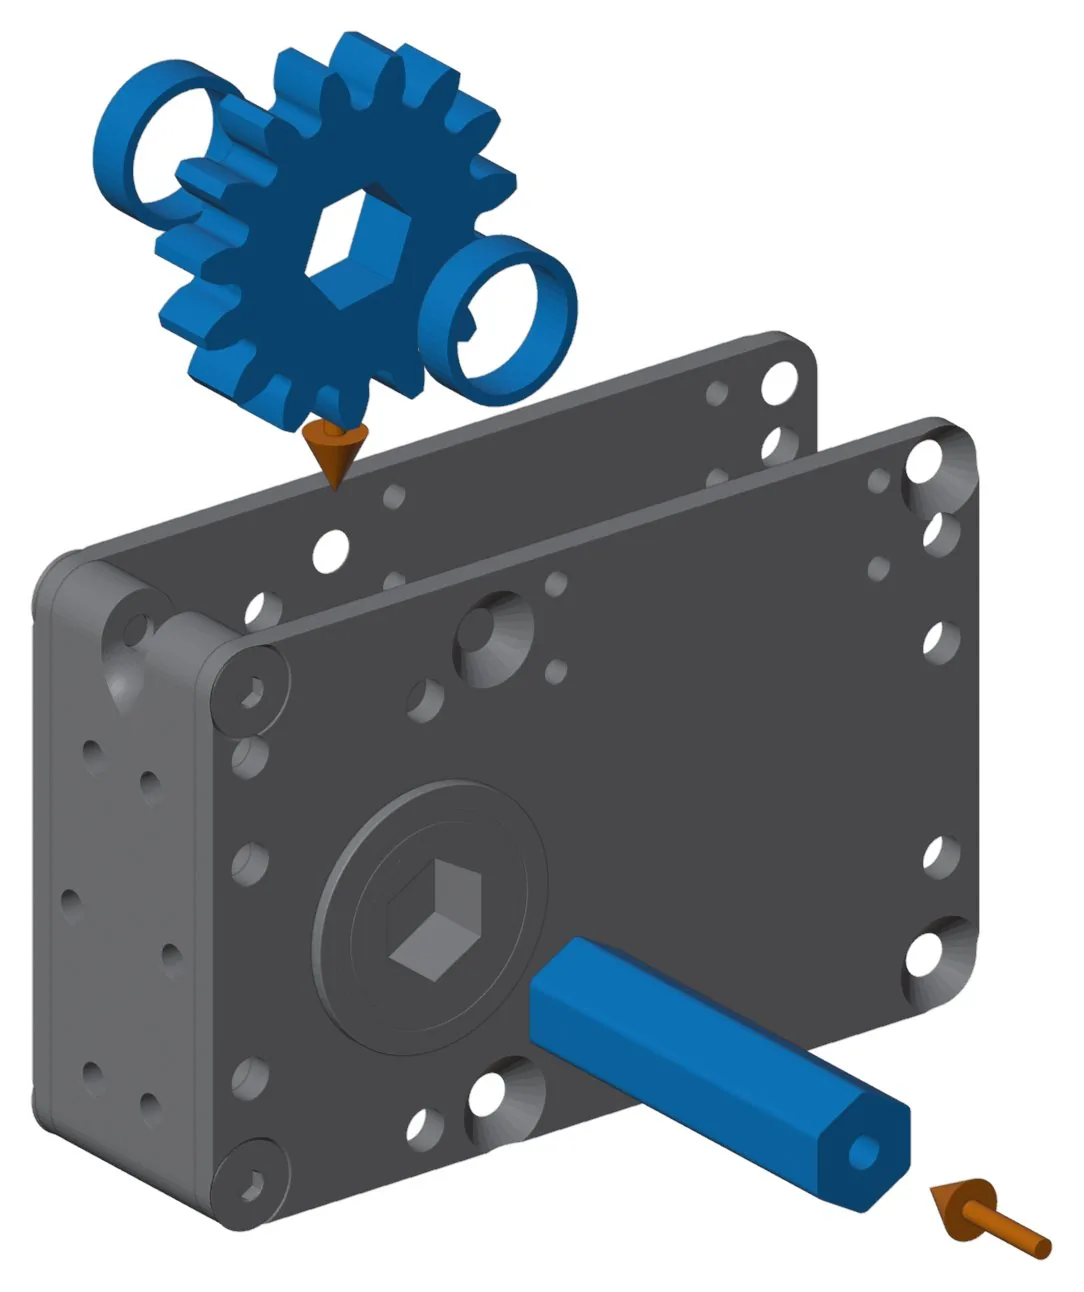
Start the 1/2 in hex axle (included, or your own) into one bearing. Slide on a hex spacer, then the 15-tooth gear, then the second spacer, and push the axle through the other bearing. The gear sits between the two spacers.
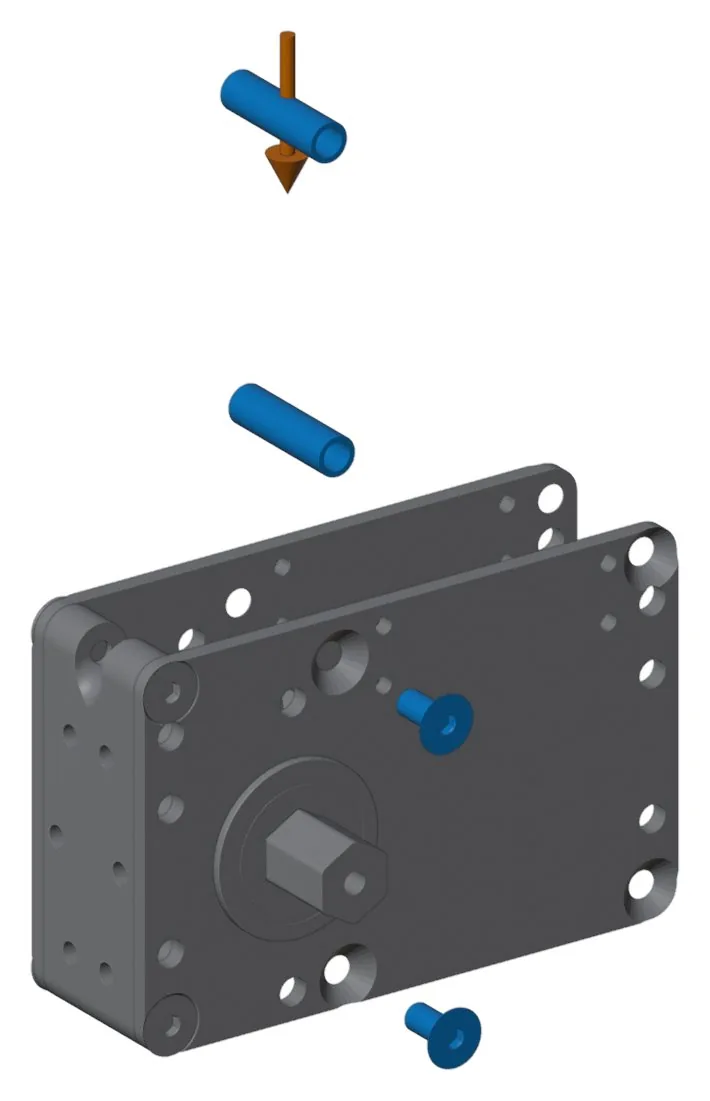
Put the two silver standoffs between the plates and fasten each end with a 10-32 x 5/16 in flat-head screw and Loctite. Use the 1/8 in Allen key.
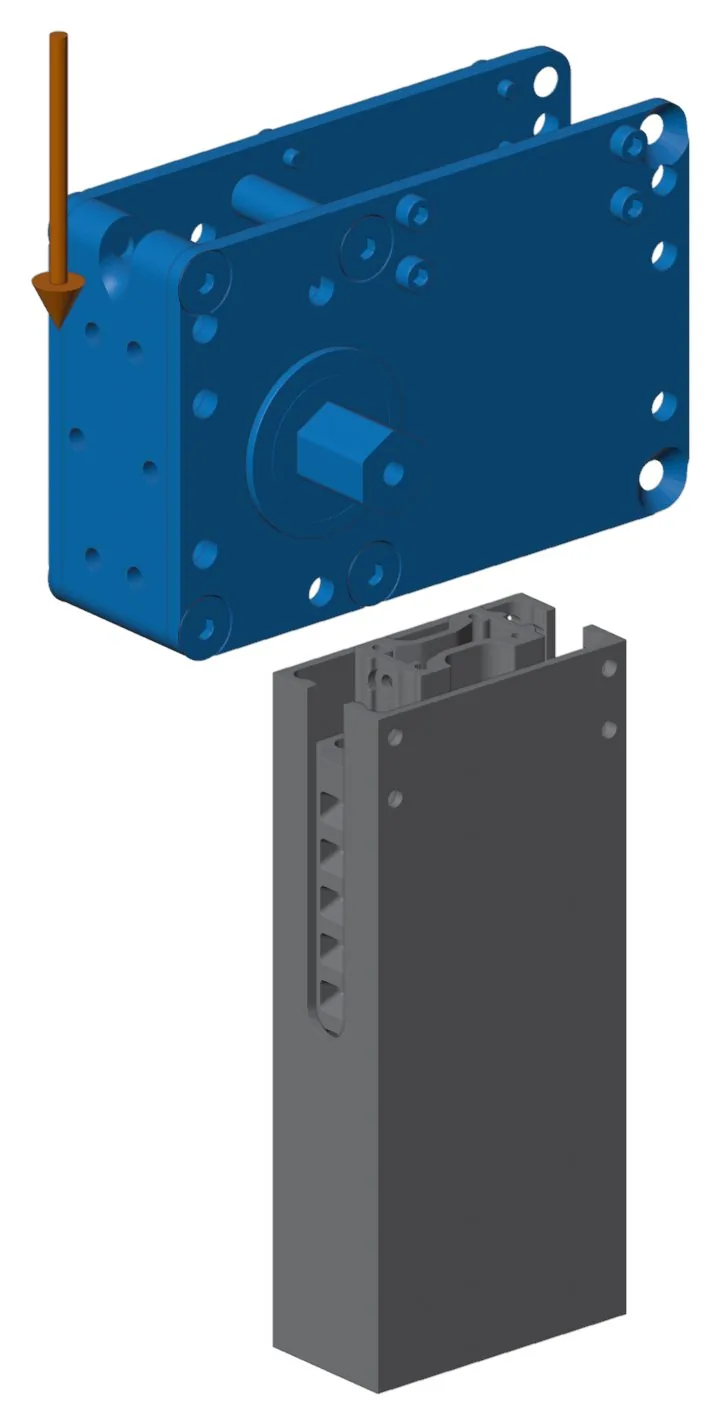
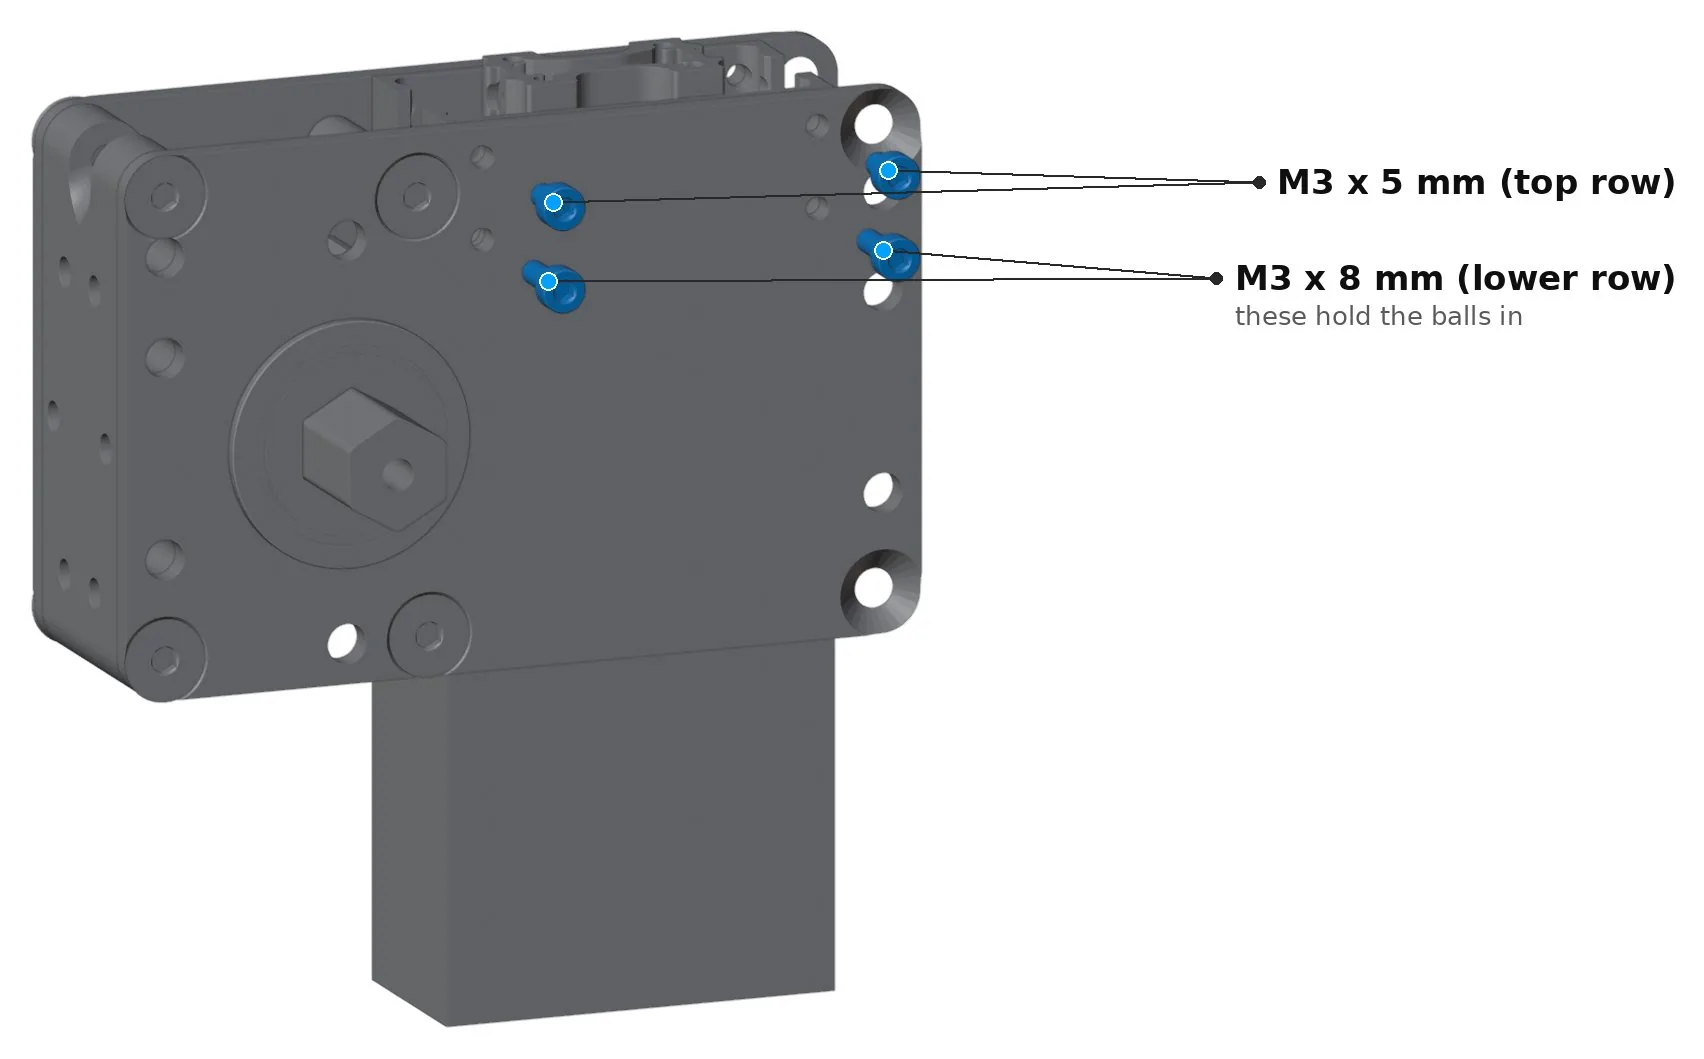
The M3 x 8 mm screws hold the balls in. Once all eight screws are in, the balls can't fall out.
Pull the stage out and push it back to check it runs smoothly and the gear turns.
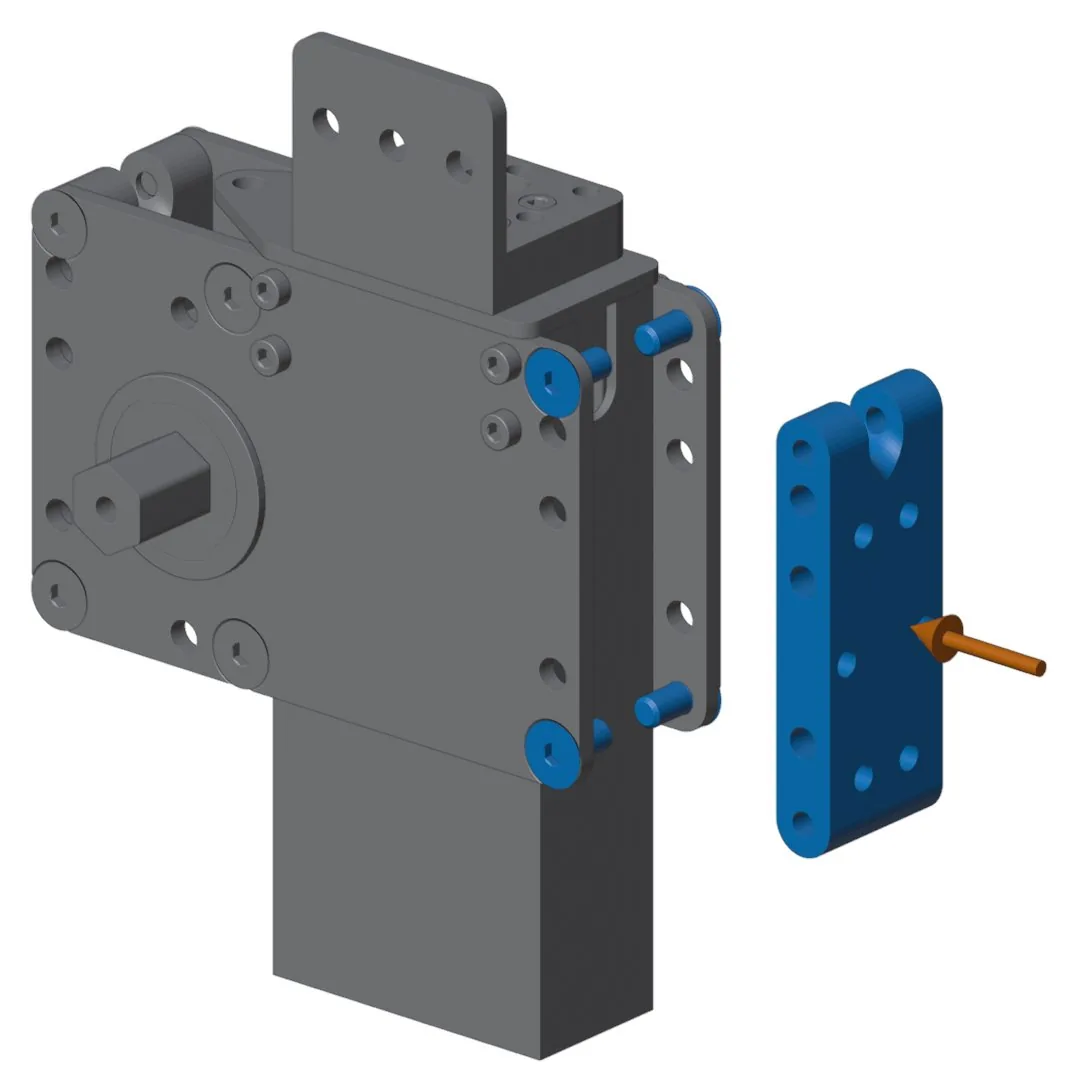
Put the back block between the side plates at the back. The cutout in the block is for the return rope, so it faces the rope. Fasten it with four 10-32 x 5/16 in flat-head screws, two through each side plate, and tighten them with the 1/8 in Allen key.
Fully retract the elevator before you start. Look into the bottom and make sure no rope is tangled. A tangled rope here causes problems later.
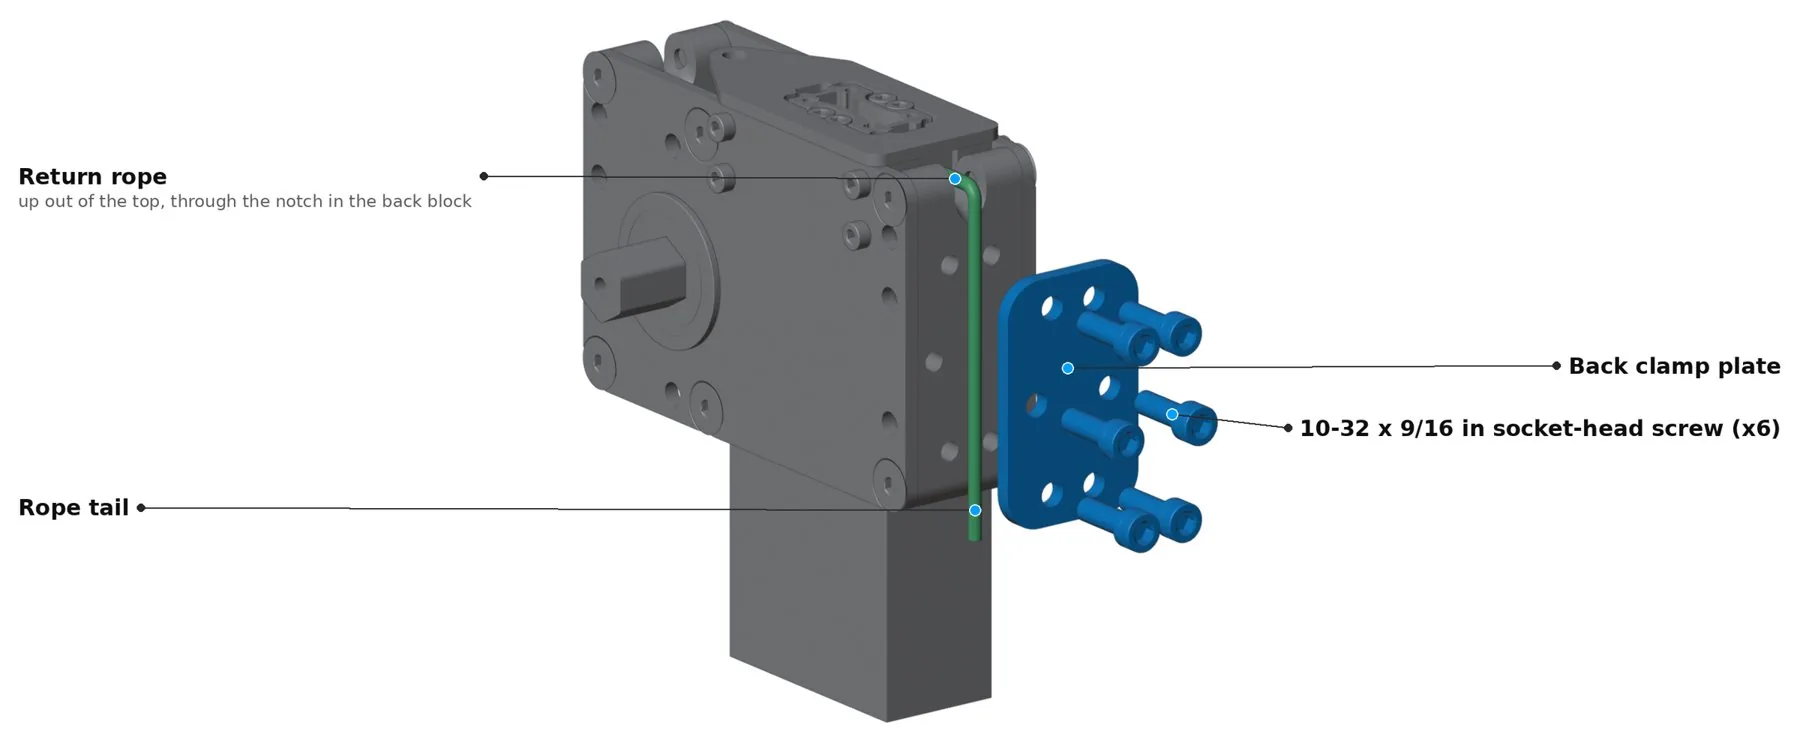
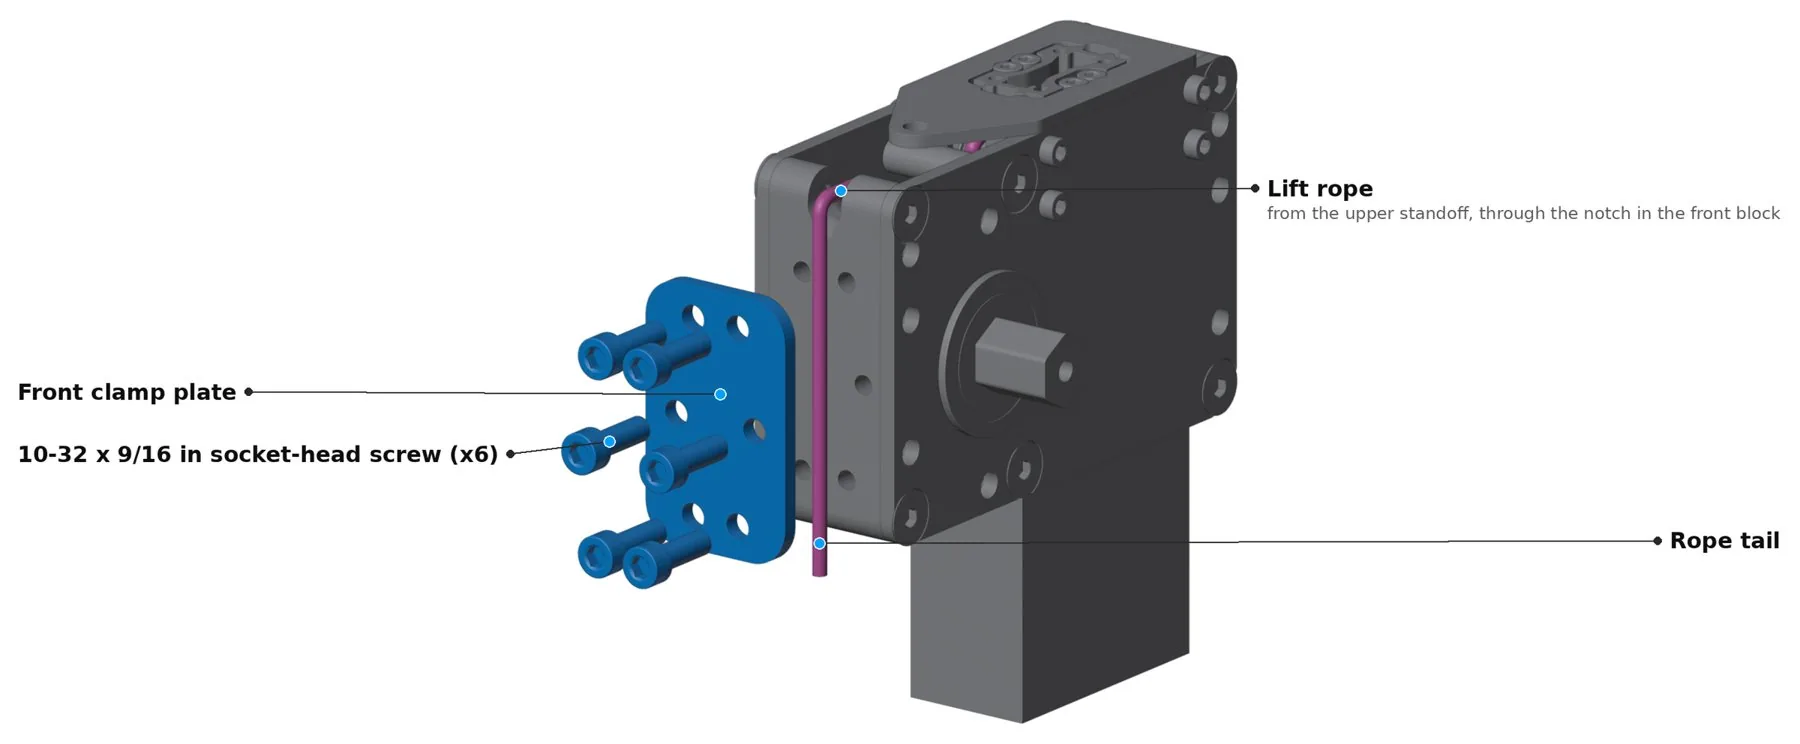
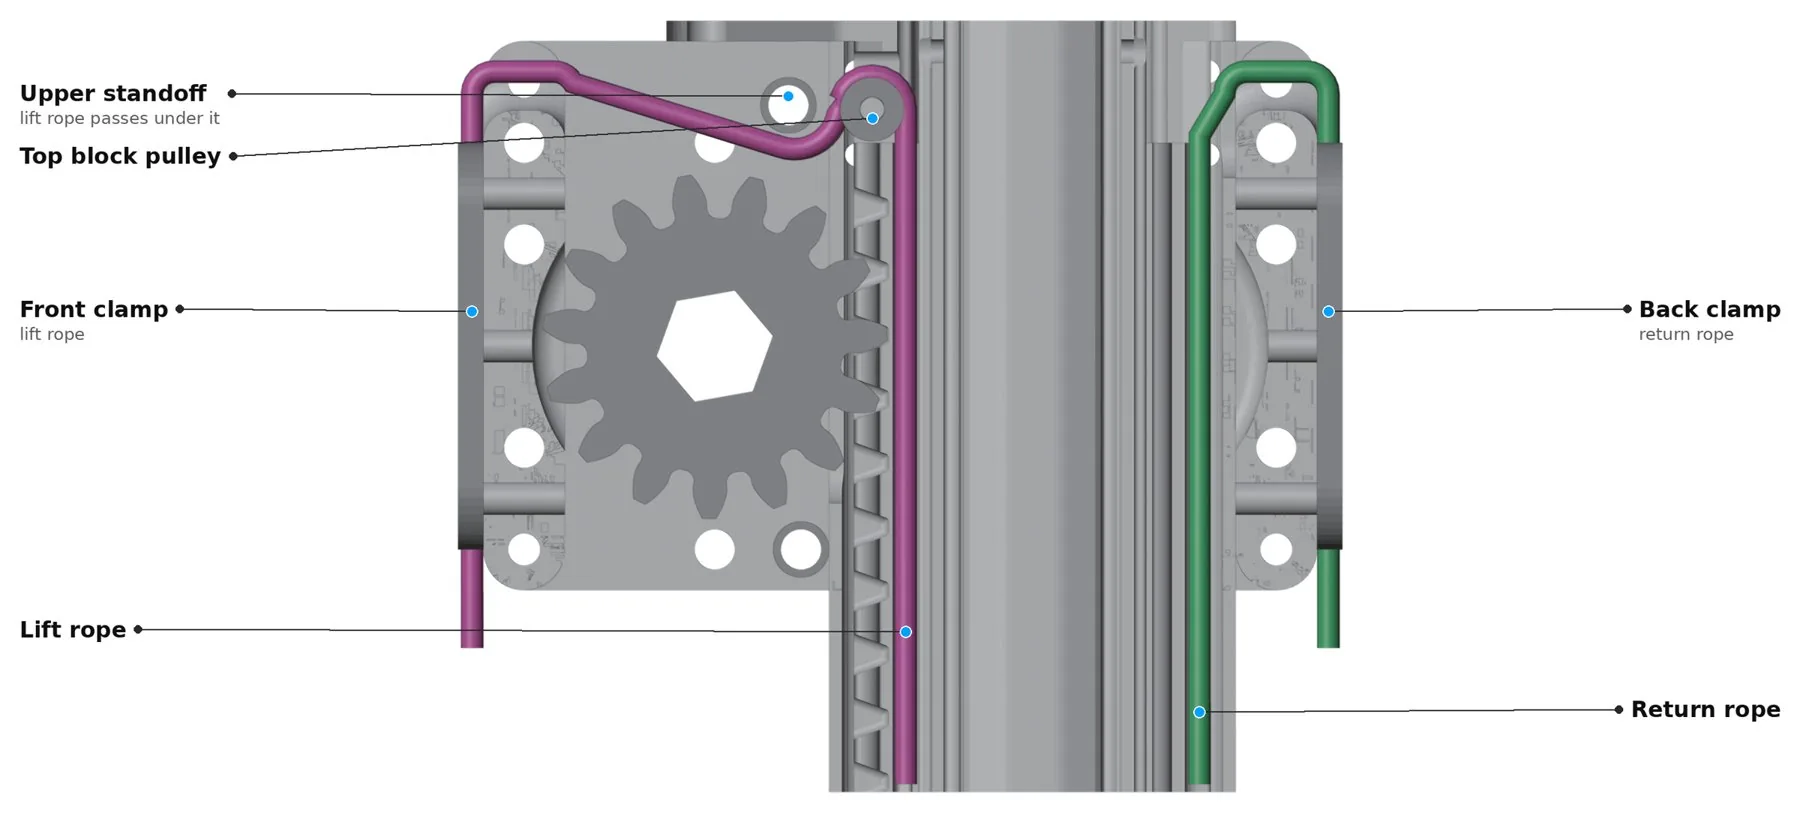
Extend the elevator to check it. It may feel a little rough until you grease it in step 20.
Re-tensioning. The rope is pre-stretched, but shock loads (for example, climbing with the elevator) can stretch it more the first time or two. You'll see it as play between the middle and inner stages. That's normal. Loosen the six clamp screws, pull the rope tight, and retighten. Once the rope has stretched that first time, add Loctite to the clamp screws.
One-stage build: skip steps 17 and 18.
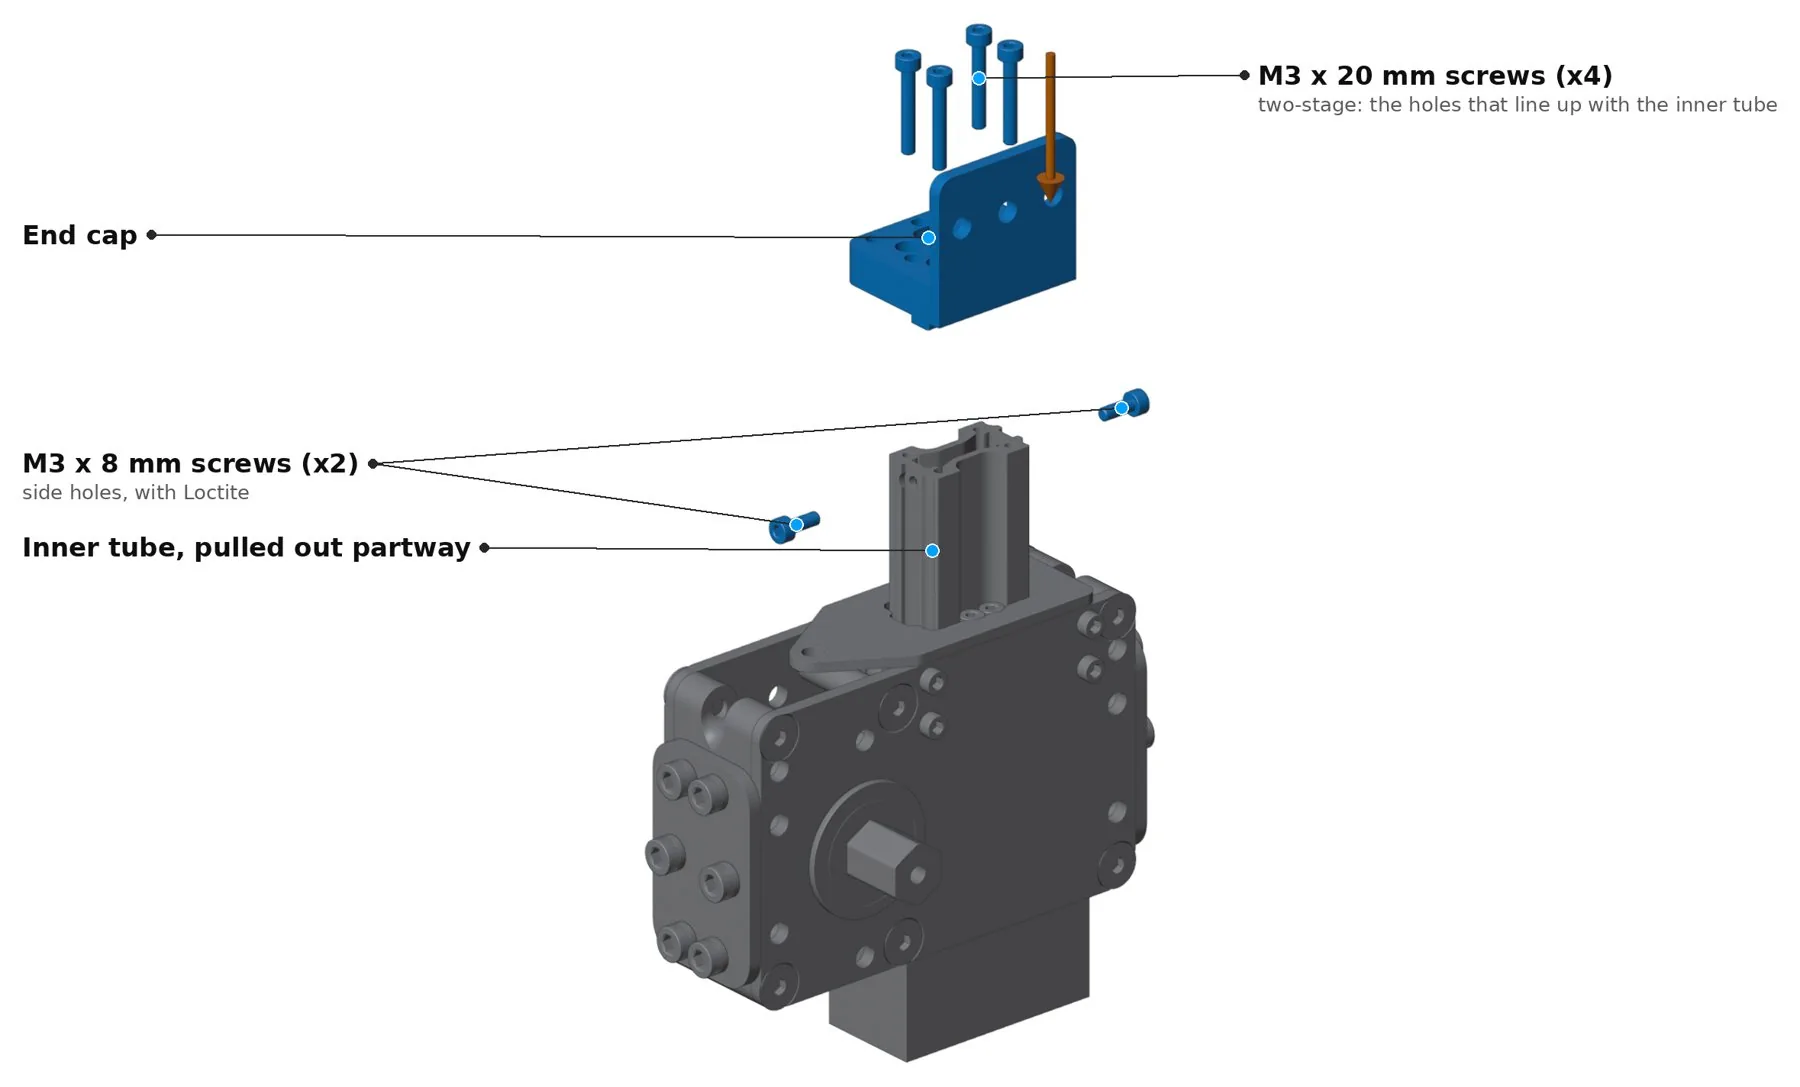
The end cap goes on the top of the inner tube so you can attach things to it. It can go on either way round.
Pull the inner tube partway out first. The screws can't go in when it's fully retracted.
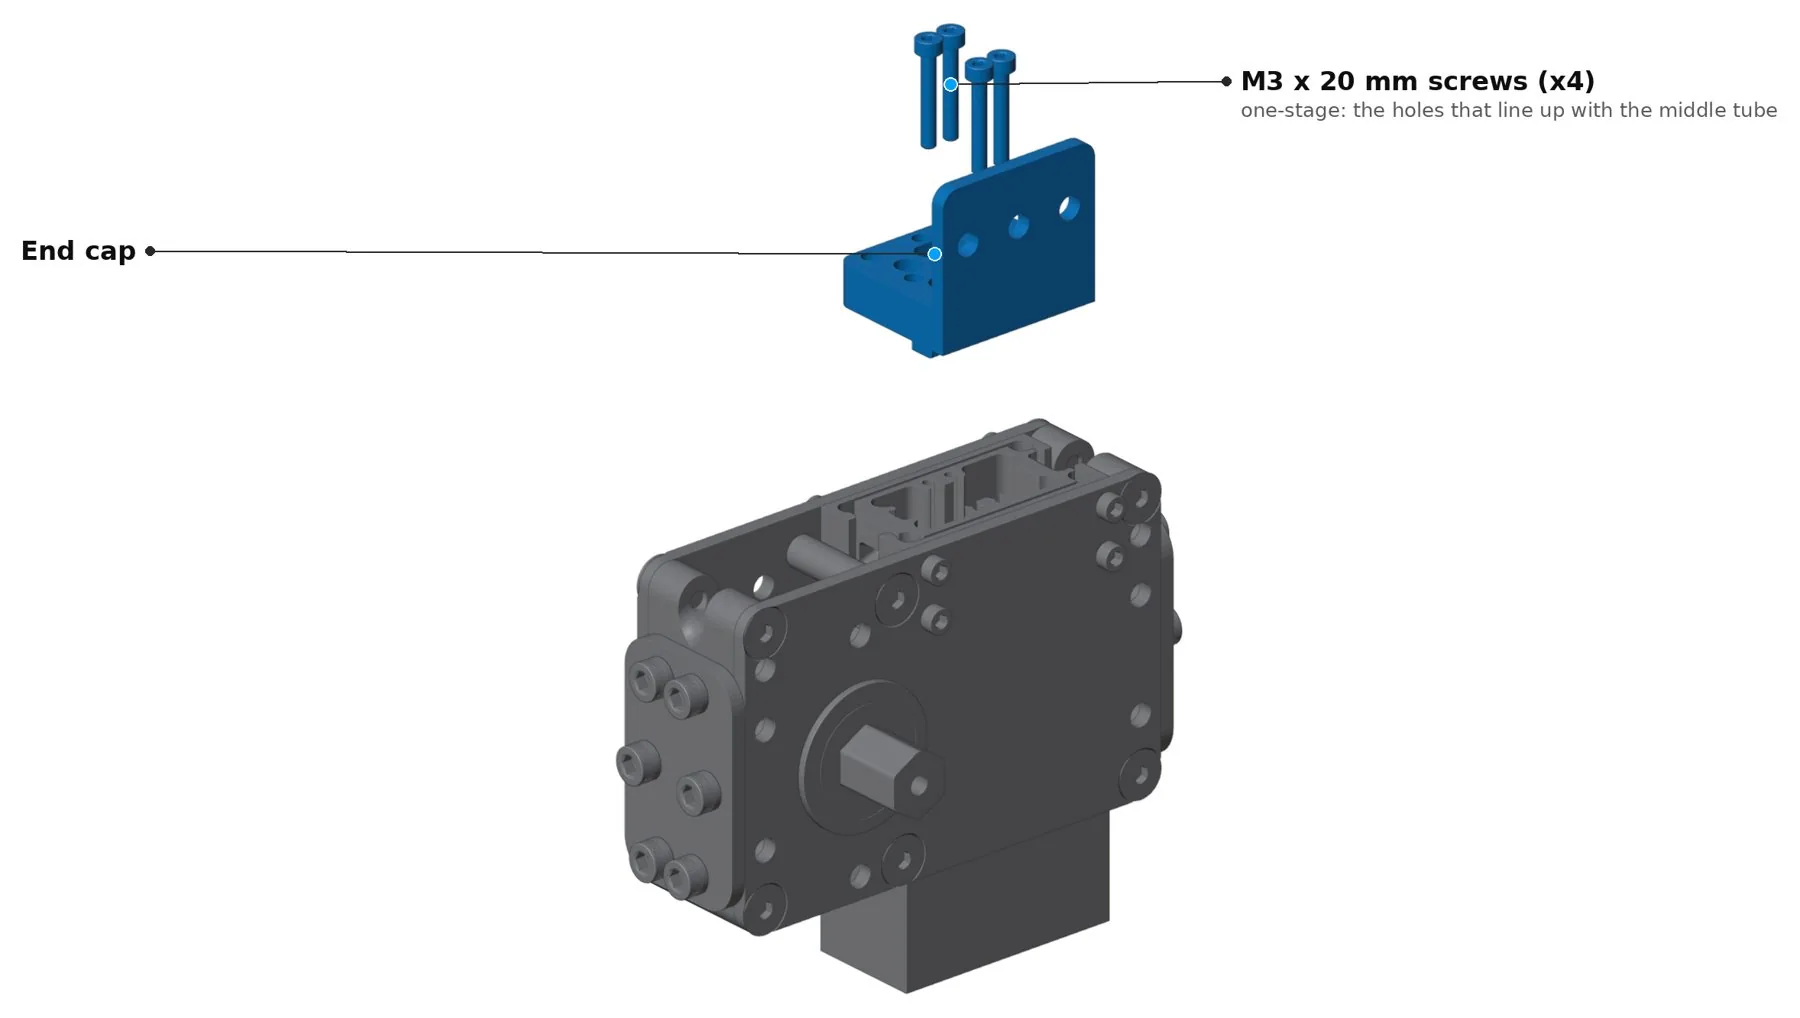
One-stage build: the end cap goes on the middle tube. Use the four holes that line up with the middle tube. The two side M3 x 8 mm screws don't go on a one-stage build, so skip them.
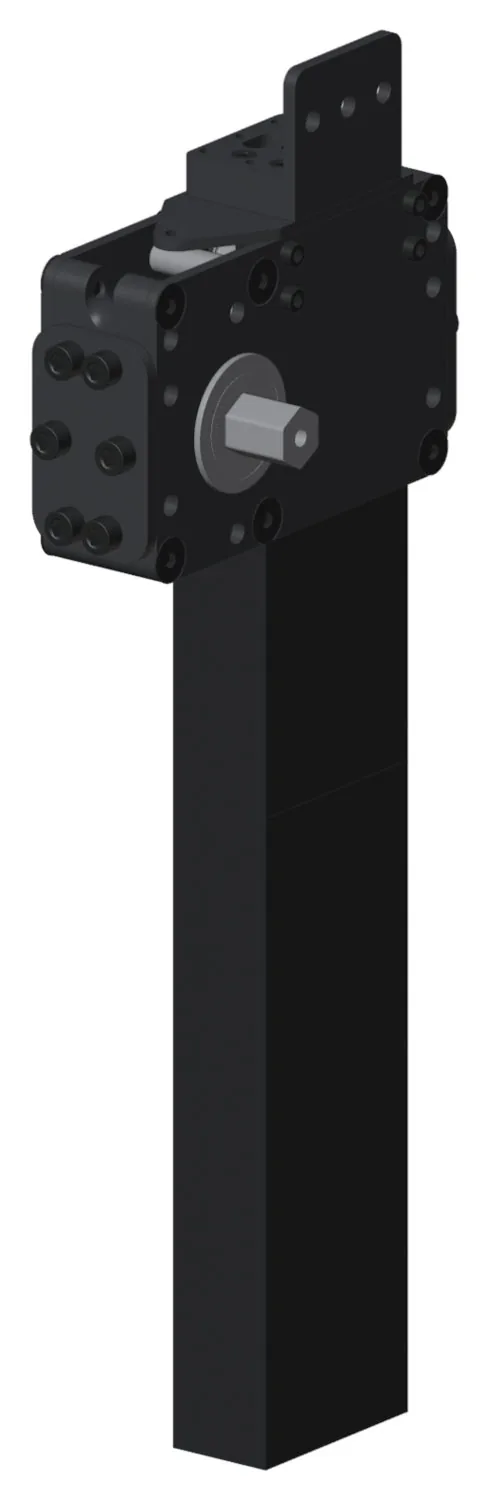
Grease every channel the steel balls roll in.
The one-stage build uses the outer tube, the middle tube, the bottom block, the gearbox, and the end cap. There's no inner tube, no rope, and no top block.
Discord support server (fastest), website chat, or support@swyftrobotics.com.
System Kits



